Knit to Flatter: Evolution of a Cover

All of the covers we design at STC Craft have their own particular challenges. Which image is the best representation of the book? Will one beautiful image suffice, or do we need more? Should we include a burst calling out a special feature, or find a way to incorporate it into the subtitle? The answers to these questions can sometimes take months to answer, and the cover for Knit to Flatter was no exception.

Before we arrived at the cheerful pink polka-dot cover shown above, designer Meg Mateo Ilasco patiently tried many options, including single images, creative detail shots, and small groupings, but nothing was quite right. Then, one night when I was at the office far too late, inspiration hit: we need to show all of the models on the cover! That is, after all, the spirit of the book: to show nine women with totally unique styles and shapes wearing hand-knit sweaters that make them look good and feel great. To put them all together on the cover was proof that there were no smoke and mirrors at play—this system of choosing sweater patterns and knitting to fit your shape works!

Unfortunately (or fortunately), editors at STC Craft headquarters don't have access to design software, so to express my vision to Meg, I dragged photos into Microsoft Word (I know, it doesn't get more low-tech than that) and created a grid. Melanie provided the inspiration for the polka dots—don't polka dots make everything fun? And that's really what we were going for. The book is a celebration of not just our bodies, but of our sweaters and our pride in what we make.

What Meg sent back was definitely getting there! But the raspberry palette just wasn't feeling right. So Meg refined her idea and presented us with four options, all of which we loved: a black option, a black-and-pink option, a white option, and the white-and-pink option we ultimately chose (see top of post). I absolutely love our finished cover, though I must admit there are a few options here that I am still fond of. What do you think, readers? Would you have picked a different cover?


Two Days at Simon Leach's House

Almost exactly one year ago, I got into a car wtih Jared Flood and Karen Schaupeter, both of whom I had brought on board to photograph and style Simon Leach's Pottery Handbook. We were headed to Simon Leach's house in rural Pennsylvania, and I must admit, we didn't have much of a plan. Many people know Jared Flood as the creator of the yarn line Brooklyn Tweed, but what many don't know is that he is also an amazing painter and a fantastic photographer--a true lover of art and master of light. And for the styling, Karen Schaupeter is our go-to girl, always adaptable, versatile, and loads of fun to have on set. Basically, I had my pottery photoshoot dream team, and we were headed to the countryside to shoot on the fly. We had a one-page shoot list that broke down the book by chapter, and we had a pretty good idea of what we hoped to photograph when we arrived, though we had no idea what would actually be waiting for us when we got there.

When we pulled up to Simon's house and saw the amazing stonework of the building, the lush green of the hillsides, the decked out studio in his garage, the throwing-wheel set-up on his front porch, and the rows upon rows of ceramics in various stages of completion, we knew it was going to be a fun time.

One of the first things to catch my eye when I entered Simon's studio was this set of teaching tools meant to illustrate the eight steps of creating a cylinder. He had them casually set up on a shelf near the wheels, and in just a matter of minutes, Karen had scooped them up and artfully arranged them on a ware board on the floor of the garage to create this stunning chapter opener.

Throughout the day, as Karen consulted with the authors, Simon Leach and Bruce Dehnert, about the objects for the still lifes, Jared roamed around shooting the myriad beautiful items in their organic settings, like this table full of bisque-fired pottery that was sitting by the kiln.

In this photo, Karen works with Simon to set up a still life of tools used to decorate and glaze pots.

And once they were happy with the arrangement, they called Jared over to weigh in on the framing and snap the shot.

And of course, a trip to a pottery studio wouldn't be complete without a little fire and smoke (or a lot, in this case). At the end of the second day, as Simon removed the scorching hot pots from the raku kiln and dropped them into hay-filled buckets to cool, Jared donned a respirator so he could get in for the tight shots without bursting into a coughing fit.

And I would say the resulting dramatic photos were worth it!

One year later, with the book completed, printed, and on sale, it's funny to look back on our process. At the time, it felt like a dizzying amount of planning and organizing, mixed with a big dose of improvisation. But now, when I look at the finished book, it all seems so neat and orderly, so pretty and calm. It reminds me of something Simon said to me when he first saw the designed pages of his book after working on the manuscript for such a long time:

"It reminds me of the analogy of a Persian carpet in the process of being woven. On the top side you see a harmony of patterns being woven, very orderly, very neat, beautifully crafted...on the underside you see a whole load of tangled, knotted loose ends!!  In fact what appears to be total chaos. Clearly you guys have been busy weaving!"

To see more of Jared's fabulous photography from Simon's book, be sure to check out the gallery here.

Handmade Holidays: Stocking Stuffers

As we get deeper into the holiday season, it's not uncommon for us crafty types to face a classic paradox: the holiday spirit fills us with inspiration to make things, but we have almost no time left to make them.

To overcome the challenges posed by this paradox, we should consider the merits of the stocking stuffer. Stockings are one of the most cherished parts of Christmas morning—a big sock filled with little things, like candies and toys, soaps and lotions, silly dollar-store treats, perhaps a gift card or maybe a pair of earrings. And, in my family, there's usually something sweet and special like a handmade gift.

The stuffed dolls from Kata Golda's Hand-Stitched Felt would make a perfect stocking stuffer. (Can't you see this mouse girl's sweet little face and arms poking out the top?) In the book, you can choose to make a mouse, a dog, or a bunny (as shown below), and the instructions could not be simpler. Just cut out your felt, sew the edges together with blanket stitch, and stuff! I finished the mouse girl shown above in a single night, beginning to end.

And for those who want a stocking to match their stuffed animal, be sure to check out Kata Golda's Felt Fox Stocking tutorial on Creativebug


Still need last-minute stocking stuffer inspiration for everyone else on your list?

While you probably won't have time to hand-stitch an entire Alabama Chanin dress to give as a gift, this headband from Alabama Stitch Book works up nice and fast. Plus it only requires a bit of T-shirt fabric and a needle and thread, so you won't have to run all over town looking for materials.

When taking on a last-minute knitting project, either keep it really small (like these coasters from More Last-Minute Knitted Gifts) or work with chunky yarn on big needles (like this cowl from Custom Knits Accessories)—the idea is that you want to be able to knock it out in just a night or two.

Machine-sewers can make all sorts of cute little things on the fly. This little dachshund necklace from Wee Wonderfuls is a perfect way to use up irresistible scrap fabric, and the bunny purse from Zakka Sewing will make any little girl excited to go back to school after winter break.

And don't forget the little stuffed kangaroo that Cristina made a few weeks ago! Easy, cute, and the perfect size to stuff into a stocking.

Partying with Heather Ross


There are many things that author Heather Ross does well, and one of them is throwing a great party. To celebrate the release of her latest book, Heather Ross Prints, she decorated the rooftop of her apartment building to the nines, put out fabulous food and endless proseco, and managed to assemble the most wonderful and interesting people in the sewing and craft community (including Amy Sedaris!) in one little space. Throughout the night, Heather flitted about her party with a gracious, easy smile. Don't you love it when a hostess seems to be enjoying her own party?

But what I think Heather enjoyed most of all was signing copies of her book for guests. After months (nay, years!) of working on this book together behind closed doors, getting the finished product out into the world is pure bliss. But even better is getting to meet the people who love the book, have a chat with them, and dish about design and fabric and crafting in general...and this party was full of people who have lots to say on these subjects.

About mid-party, a thunderous storm passed over the city and we all ran inside to get out of the rain. Lucky for us, the party continued indoors where a giant Mac ran a slideshow of images from the book--the very Mac, in fact, where all of the prints and projects were designed!--and we could view a whole slew of projects that were on display. The party carried on well into the night, and in addition to the other photos shown here, the lovely Kollabora staffer Leslie Henkel even managed to get a few group photos (that's assistant editor Cristina Garces on the left, artist Katy Tanis next to her, and Heather and I on the right...don't we look oddly like sisters?)

After all of that work, it was great to sit back and enjoy the moment. Congratulations on a job well done, Heather! 

To see projects from Heather Ross Prints in person, stop by the Kollabora booth at the Maker Faire this weekend; they'll also have copies of the book to buy if you want to pick one up.

We Love Parties!

It's launch party season over here at STC Craft! To kick things off,  last Saturday we celebrated the release of Gertie's New Book for Better Sewing. The party was held at The Sewing Studio in Chelsea, and what else would you expect author Gretchen Hirsch to wear than the epic Strapless Party Dress from her book? Just look at the glamourous way the dress poofed up around Gretchen as she enjoyed a well-deserved piece of cake!

Of course, other finished garments from the book were on hand for our viewing pleasure (on dress forms--not all on Gertie), and it was quite a treat to get to see the garments in person. I loved being able to look at them inside and out and see the fine craftsmanship. Those bound buttonholes are a sight to behold! And this perfectly tied bow-tie was rather impressive, as well.

Over the course of the night, Gretchen signed books by the moody lights of the sewing machines scattered about the studio, and there was a general feeling of revelry in the air. Thanks so much to all of the companies who came together to throw such a wonderful party: The Sewing Studio, Kollabora, Creative Bug, and Coats and Clark. A great time was had by all! And we couldn't be prouder to see this book go out into the world and into the hands of so many fabulous sewists.

To see more photos of this super-fun launch party, be sure to check out this post from Kollabora, and this post on the Creative Bug blog.

Next up...all of us at STC Craft will be picking out our party dresses for the Heather Ross Prints launch party this weekend. I wish I had time to make myself a Strapless Party Dress like Gretchen's!


Pottery Class - Part 2

About two months ago, I left the safety of my orderly desk and ventured into a cermics studio for the first time, determined to learn the craft of turning clay into tableware. It's an art form that I have long admired, but the opportunity to learn how to do it never presented itself...that is, until I started working on Simon Leach's Pottery Handbook (a comprehensive guide for making wheel-thrown pottery, which we're editing now and planning to publish in Spring 2013). Now that I've completed my beginner's course, I can attest to the fact that a lot happens to clay on its way to becoming a pot: After its first spin around the wheel, the pot is deemed a "keeper" or a "do-over." If it's a keeper, then you set the pot under plastic for a few days or a week until it has firmed up and dried out a bit, at which point you put it back on the wheel and trim away excess clay, carving the bottom into a delightful shape. The pot is then bisque-fired in a kiln (which is sort of like prebaking a dough), and then it gets dipped in glaze and fired at super-high heat in a kiln, and this is where the glaze turns to glass, coating your creations in the most fascinating ways.

See how much I've learned?

I must be honest--I didn't know how much I would love seeing the finished product. As you may recall from my first post, as a beginner I was happy just to see the wet clay become a somewhat symmetrical shape. But the first time I saw my clunky little freshly glazed pots, I breathed out a sigh of wonder. Oh, would you look at that glossy finish!, I thought, when I first saw the little blue bowl above. Or, when looking at the bowl below: How fascinating that the turquoise came out so matte, with so much gray and deep navy blue...

My proudest achievement (so far, anyway) has been the little creamer below. When I first threw this pot, I had in mind that it would be a little bud vase, but then I looked at its rim and thought, if I squeezed the clay just so, I could create a spout. (For the record, the act of creating that spout required a fair bit of courage since it was a nice bud vase as it was, and some things really are better left alone.) But now that it's glazed, I can't imagine it any other way.

Admittedly, I seem to have a fetish for finger bowls, and my favored palette appears to be distinctly Mediterranean. I supposed it's a good thing I love olives and roasted almonds, since it looks like I'll be serving a lot of these at my house! And yes, it's true that almost every one of my pots is wonky, but that doesn't bother me too much. In fact, I now look at the ceramics sections in stores and cannot believe that there are potters out there who can throw tableware so consistently. Someday, I think, if I keep practicing, I might be able to do the same. But for now, I'm thrilled that I have challenged myself to learn something new, and I have the good fortune of being taught by and working with some of the best potters in the world as we develop what will truly be an amazing pottery book. And finally, I hope that this post inspires you to try your hand at something new--until you try, you'll never know what exciting, wonderful, and wonky creations will spring forth from your own two hands. What is it that you have always wanted to learn? Please share in the comments section below!

Mother's Day Books & Giveaway!

 Photo by Ericka McConnell from Weekend Knitting

If you ask most moms what they want for Mother's Day, they will most likely request a day of ultimate relaxation. But if you ask moms who are crafters what they want for Mother's Day, chances are they will want something that involves both relaxation and crafting--a concept that we fully endorse!

Most of us at STC Craft come from a crafty lineage, and I'd say a healthy percentage of our authors first learned their amazing skills from their mothers. So when we started thinking about gifts to give our moms for Mother's Day, we got to wondering--if we had to pick one STC Craft book to give to our moms, which one would it be? We posed this question to several of our STC Craft authors and staff, and we loved hearing the stories about why each person thinks their mom would enjoy a particular book. But we don't want to stop there--we want to hear from you, too! Leave a comment telling us which STC Craft book you would pick for your mom and why, and if your name is picked, we'll send your mom a copy of the book you've chosen. To enter the giveaway, leave your comment before Friday, May 11 at noon EST.

Click here for full official rules.

Michelle Inciarrano and Katy Maslow, authors of Tiny World Terrariums, say:

The BUST DIY Guide to Life! As regular sellers at the BUST Craftacular gift fairs in NYC, we're very familiar with their magazine and mission. We fully approve! And Katy's mom, being a very crafty lady with a love of DIY, would totally enjoy a book full of inspiring ideas for a day of handmade, homespun fun.


Gretchen Hirsch, author of the forthcoming Gertie's New Book for Better Sewing, says:

I would definitely give my mom Denyse Schmidt's new book, Modern Quilts, Traditional Inspiration. My mother is an avid (and award-winning!) quilter, and I know she would love the gorgeous inspirational photographs and designs.


Liesl Gibson, author of Oliver + S, says:

My mom is a fantastic seamstress (both machine and hand stitching), and she’s sewn for me and my four sisters all our lives. Now that she’s retired and has a little more time to sew for herself (and for fun), I think she’ll enjoy Alabama Studio Sewing + Design and all of Natalie’s wonderful projects and techniques. I hope she’ll make something for herself and will find lots of inspiration from the book. Plus, my mom and Natalie share a similar quiet, thoughtful approach to life. I think they would get along really well if they met!


Melanie Falick says:

My first thought was to choose Alabama Studio Sewing + Design by Natalie Chanin for my mom because she's already made several pieces of clothing from Natalie's other books and I think this one would inspire her to try more techniques. But this is a selfish choice since she makes these clothes for me (making me feel incredibly lucky). So, on second thought, I'm going to choose Stitch Magic by Alison Reid. Maybe Mom will be inspired to use some of the beautiful fabric manipulation techniques in that book to sew pillows or curtains or a new bedspread for her house. I think she might like the cushion covers in the Pleating chapter for her living room or the bed throw in the Folded Shapes for her bedroom. When we're both making projects, we always have something interesting to talk about. 


STC Craft marketing manager Ellie Levine and STC Craft senior editor Liana Allday both picked Weekend Handmade.

Ellie says: The first weekend that feels like spring, you'll find my mom out in the garden, weeding, planting, and plotting new ways to make the backyard beautiful. When I visit my parents, the first thing I do is take a tour of her latest updates to the landscape, and I can always count on a beautiful flower arrangement on her kitchen table. My mom would adore Kelly Wilkinson's Weekend Handmade: the chapter called "Grow" presents projects inspired by gardens, fields and farmers' markets—three of my mom's favorite things. The Pressed Flower Luminaria, Botanical Note Cards, and irresistible Handmade Labels would all be perfect DIYs for us to create together on a sunny afternoon.

Liana says: My mom is a lifelong crafter, and she is constantly wandering between decoupage, embroidery, gardening, watercolor, and anything else that catches her fancy. For those reasons, I pick Weekend Handmade. Not only is Kelly Wilkinson's California aesthetic a perfect match for my mom's sunny Californian style, but just like my mom, the book wanders around from craft to craft in the most delightful way.

Pottery for Beginners: Liana is at the Wheel!

A few years ago, one of our freelance graphic designers asked me if I had ever heard of the potter Simon Leach. Being a devoted fiber arts nerd, I had never wetted my hands with clay—not even in high school or college art classes—and so naturally I had never heard of Simon. But after she showed me a few of his YouTube videos, I quickly saw why thousands of potters were viewing his basic pottery lessons over and over: Simon Leach is a fantastic pottery teacher.

After roughly a year’s worth of conversations, Simon committed to making a pottery book with us, and we're thrilled that his book is on our Spring 2013 list. Pottery is a brand new category for STC Craft. As many of you know, we started out in 2003 primarily publishing knitting books, and then moved into sewing and quilting. Since then, we’ve branched out into printing, paper crafts, and even terrariums, but a large, comprehensive pottery book is new and exciting territory for us. And because it’s nearly impossible to edit a craft book without first understanding the craft, we decided that I really ought to get my hands dirty and take some pottery lessons

 In most pottery books instructions for throwing pots are broken down into a series of subtle hand movements—the left hand centers the clay on the wheel, the right hand lifts the clay into a cone, the middle and ring finger drill a hole into the center of the cone, and then the fingers pull outward to create walls and open the vessel. For each of these steps, there are accompanying how-to photos, and so—as an editor who had never touched clay before—I felt oddly smug reading through the instructions, thinking well this all makes perfect sense, or well that doesn’t seem so hard. But it wasn’t until I sat down at the wheel that I really understood what it takes to put the practice into action.

My first class was three weeks ago, and I must confess, I am not yet an expert potter. Shocking, I know! Oh, it’s true, I walked into that first class harboring some elaborate dreams that I would be a natural, cranking out perfect, delicate teacups every 15 minutes. But those subtle hand movements were a little trickier to put into practice than they seemed. Despite the initial challenges of my first class, I think you can tell from the photo above that I was having an awfully good time.

Truth be told, as a crafty girl through and through, I love the moment when you really gain respect for a craft. Not to say I didn’t respect pottery before I sat down at the wheel, but I do not think that I appreciated the subtle skill involved, nor did I understand how crucial the role of teacher is in this craft. Without the teacher—whether it’s an in-person instructor, a YouTube video, or a how-to book—we would all be lost!

Each of our classes begins with a demonstration from our instructor, Aimee. Watching an experienced ceramicist throw a pot on the wheel is an absolutely mesmerizing sight. (For that reason alone, you should really go check out Simon Leach’s YouTube videos.) When Aimee does her demo, as shown above, all of the students huddle around her as she expertly guides the clay into the most pleasing shapes, and then uses her throwing stick to trim away the excess clay at the bottom, making a perfectly curved shape. While Aimee's pleasing vessels are the ultimate goal for us aspiring potters, my funky little cylinders and bowls are getting better and better each week. But best of all, my understanding of how to edit the forthcoming Simon Leach’s Pottery Handbook are infinitely improved. As I work my way through this 8-week course, I'll be sure to keep you all up-to-date on my latest creations--be they wonky, cute, or laughable! Ta-Da--one of my first creations!

Knitted Dinosaurs, Wee and Whomping

It's awfully exciting to come to work in the morning and find a box on your desk containing a knitted dinosaur. It's even more exciting (and, okay, a little strange) when that happens every day for a week! But alas, there was a reason I came to work each day last week to find a new knitted dinosaur waiting for me: We had hired knitters all over the country to make samples of all shapes and sizes from our new book, Knitted Dinosaurs, for display at Vogue Knitting Live (last week) and for TNNA (this coming weekend).

Our favorite part was seeing how different yarn weights can change a dinosaur so much! In the photo above are a Pterodactyl and Stegosaurus (on the right) and a giant T-Rex named Petunia (who has a few miniature Troodons riding on his* back), all of which were made from delicious Blue Sky Alpaca and Spud & Chloe yarns. Petunia was made with Spud & Chloe Outer, a super bulky weight yarn, and came out a whopping 42 inches long and 34 inches around...almost three times bigger than he is when made with a DK-weight yarn! The beautiful thing is that the patterns in the book work no matter what your gauge, so you can make the dinosaurs any size you like.

We also loved seeing the way that two different yarns at the same gauge could subtly alter the look of a stuffed dino. The Pterodactyl above was made with Spud & Chloe Sweater yarn, which is a fluffy, cuddly wool blend, while the Pterodactyl below was made with Spud & Chloe Fine Sock yarn, which gives the fabric a tight, sleek look.But best of all was seeing how each individual knitter interpreted the pattern and put her spin on it. Each dinosaur was stuffed to a different degree of firmness or squishiness; some had flirty eyelashes to match their colorful button eyes; and the placement of the legs or arms was just slightly different on each one. It's funny how all of these details gave each dinosaur a distinct character, reflecting the person whose hands had made it.

If you'd like to see the knitted dinos in person, be sure to stop by the Unicorn booth at TNNA this weekend. A few of them will be hanging out with the rest of the STC Craft books. And word has it that Petunia and a few of her pals are heading over to Knitty City for the rest of January. So, if you're on the Upper West Side in New York City, go for a visit. Knitty City is walking distance from the American Museum of Natural History, where some other pretty famous dinos reside.


*Though it may seem counterintuitve to name a boy dinosaur Petunia, I was told by his maker that yes, he is indeed a boy.

STC Craft Gift Guide and Special Holiday Giveaway

UPDATE: In the spirit of the holiday season, we've decided to extend the contest through Friday, December 23rd. We'll be picking three lucky winners that day at noon so after you've left a comment, be sure to tell your friends to enter as well!

Have you run out of time to make crafts for the crafty people in your life? Then keep it simple and treat them to a beautiful craft book. And while you're at it, leave a comment below and you will be automatically entered in our free book giveaway! Just tell us your favorite holiday craft—whether it's ornament-making, cookie baking, or making lavish handmade gifts. The contest closes next Wednesday, December 21, at noon EST. If your name is drawn, you'll win a book of your choice from our online catalog.

For those who love to make toys:
Knitted Dinosaurs & Wee Wonderfuls


For those who love to read about knitting (and make a few things too):
My Grandmother's Knitting & A Knitter's Home Companion


For sewists who want to take their stitches to the next level:
Stitch Magic & Sewing Basics


For knitters who want to take knits and purls to the next level:
Loop-d-Loop Lace, Reversible Knitting


For holiday crafters:
Have Yourself a Very Vintage Christmas
Crafting a Meaningful Home


For crafters on a budget:
PS I Made This and Repurposed Library


For crafters who want to make everything:
Bust DIY Guide to Life


For backyard enthusiasts:
The Complete Kitchen Garden & Beekeeper's Bible


For culinary crafters:
Home Made, Sugar Baby, Canning for a New Generation
For those who love to make children's clothing:
Oliver + S, Knitting for Baby, Vintage Baby Knits
For top-down knitters:
Custom Knits 1, Custom Knits 2, & Modern Top-Down Knitting
For weekend crafters:
Weekend Knitting, Weekend Sewing, Weekend Handmade
For procrastinators: Last-Minute Series


Guest Blogger: Wendy Bernard on Customizing Her Knits and 90210


A month or so ago, my editor for the Custom Knits series, Liana, asked me if I would want to write a guest post for the STC Craft blog. We went back and forth on what I should write about, such as my experiences writing Custom Knits 2, or what it’s like knitting for my family, but nothing was feeling especially inspiring to me. That is until she finally said I could write about any old thing, even Beverly Hills 90210, if I wanted to. I’m not sure if she was joking, but I figured I might as well take her up on it, and actually 90210 does have something to do with how I write books. Truth is, I average two hours of the stuff a day when I’m writing a book and I’m not lying. (Believe it or not, I’m sort of proud of it, because at this point I’m an expert. I can look up at the TV, glance at Donna’s hair color, and know right off the bat what season it is.) 90210 keeps things interesting for me when I’m sitting in my office knitting or writing. In fact, as I type this out, Donna’s hair is short and blonde and that means she’s in the early part of her college career and her boyfriend’s name is Ray.

But what else does knitting have to do with 90210? Well, it is (obviously) set in Southern California, which is where I also happen to live, and living where I do is part of the reason why I started to customize my knits in the first place. You see, it’s almost always warm here, so if you’re knitting, you’re not usually knitting for warmth. When I started knitting and wanted to make sweaters, I always had to change things around in the original pattern in order to suit my climate. And this is what gave me the opportunity to start honing my design chops.

When I was a kid, my family lived in Minnesota, and my grandmothers--both of them knitters--would knit mittens for me. But when I moved to Southern California in the late 70’s, I noticed that the only people who seriously wore knits were wearing them for an hour or two, or in a super-cold office, or for pure fashion, and not usually out of necessity. As ironic as it may seem, it was in Southern California that I eventually found my favorite thing to do—knit and design and write books about it—yet I couldn’t experience what it was like to actually “use” the knits the way they were originally intended: for warmth.

So imagine how it has been for me to fall into a career and a passion that has so many environmental constraints! If I want to knit for myself, I absolutely have to consider my surroundings. Does it make sense to knit a cardigan that takes me weeks to knit and only be able to wear it for a few days in a season? Nope. What about a pullover? Does it make sense to spend a month knitting a pullover with the nicest alpaca I can find so I can wear it for, oh, two hours? No. No. No. But you know what? If I slapped short sleeves onto the cardigan instead of the long ones, I might be able to wear it. And the pullover? Same thing: Shorten the sleeves, add a deeper neckline to allow a colorful tank to show through, and I’m set. The alpaca part? I’d probably still knit with alpaca—some of my favorite yarns have alpaca—but I’d probably try to find a blend or something in a sport weight.


When I think back on how I naturally approached knitting when I first started designing, I realize that my personal limitations and point of view actually worked in my favor. I knew that people living in colder climates might want to wear warm items with long sleeves or cowl necks and spend the time knitting them, but I also discovered that people like me–who live in areas where there are fewer knit-wearing opportunities–might also like to knit them and wear them, and so I started to think about variations. The Knotted pattern from Custom Knits 2 (shown above) is a perfect example of the same sweater pattern being put to use for people living in different climates. If you live in a warmer place, like me, then you can knit the vest version of the pattern (in yellow, above) as is. But if you live in a cooler climate, you may want to add long sleeves and a hood to the pattern (in red, above)--which are both things I show you how to do in the book. And this has been the way that I have approached the Custom Knits series: I encourage you to look at a pattern and make adjustments so that the garment works in all areas—perfect for your climate, body shape, and personal preferences--and customize it so that you will actually get to wear it (and want to wear it).

For Custom Knits 2, I even went a step further with the customizing, this time including answers to all of the questions I have received in recent years about more advanced customizing techniques. For example, I have heard from knitters all over the world who would like to make a child’s pattern in a woman’s size (or vice versa), and in this book, I show you how. Many, many people have also asked how they can customize a raglan—one of the trickier sweater styles to customize--so I addressed that question in the book, too. In fact, the Zuma Tunic (shown above on the cover) is a raglan, and there are all sorts of ideas for customizing this pattern in the book.

So whether you’re living in 90210 or in 10011 (that’s the zip code for STC Craft), the key to successful sweater-making is understanding what works for you and how to make changes to existing patterns so that you end up with a beautiful garment that you can actually wear and love. Speaking of making garments you'll love, why not try your hand at making one of the patterns in Custom Knits 2 along with a helpful, inspiring group of other knitters? Next week, I'll be kicking off a Custom Knits 2 knitalong where knitters from all over the country will create garments from the book (and most likely customize them to their heart's content). Be sure to join the Knit and Tonic Knitters Group at Ravelry.com for announcements and updates, and check out my blog, Knit and Tonic, for more information.

Knitted Dinosaurs Take Manhattan

This summer, we were thrilled to have some visitors join us at STC Craft headquarters in New York City. Tina Barrett, author of our new book Knitted Dinosaurs, sent five of her favorite prehistoric pals to hang out with us for summer vacation.

Truth be told, we had requested the samples for a sales meeting in July, but once we saw how amazing the dinosaurs were in person—just as detailed and nuanced and cuddly and ferocious as they appear in the book—we were reluctant to send them back. What can I say? We were smitten! Knowing that we couldn’t keep them forever, we decided at the very least to take some photos. For starters, Ellie arranged them on her desk (above).

And I couldn’t help but pose with a few, taking photos on my Mac with Photo Booth…after all, it’s one thing to tell your friends that you have a group of knitted dinosaurs on your desk. It’s quite another to send them a photo of a T-Rex attacking you at your desk!

And while I love each and every one of them, I do believe that the Triceratops has stolen my heart.

Since our dino friends were visiting from the UK, we thought it was only right to take them on a little field trip around the city. Here Parasaurolophus takes in the splendor of the Empire State Building just outside our STC Craft office on 6th Avenue.

Of course, now that we’ve shipped the dinosaurs back home, we’re going to have to fill the void by making our own buddies to keep. And as of this week, you can make your own dinosaur buddies, too! We’re thrilled to announce that the amazingly adorable Knitted Dinosaurs is now in stock. To see photos of the rest of the dinosaurs in the book, be sure to check out the gallery...you will not be disappointed. And if you DO make a dino, we would love it if you shared a photo with us on our Facebook page or tweet your photos to @STC_Craft. (If you couldn't already tell, we love seeing photos of knitted dinosaurs!)

Introducing...The BUST DIY Guide to Life

The idea for The BUST DIY Guide to Life came to us one day in fall 2009 as Melanie and I sat around the office, dreaming up future books. I said something like, wouldn’t it be amazing to do a book with BUST magazine, including hundreds of their craft and DIY projects from over the years? And Melanie said something like, let me give Debbie a call! And so we found ourselves just a couple weeks later having lunch with Debbie Stoller and Laurie Henzel, the editor in chief and creative director of Bust, talking about this exact book idea.

1,498 emails and 23 months later, we have a book! And so it is with great excitement that we want to tell you a bit about The BUST DIY Guide to Life and why we hope you will be excited about it, too.

At our kick-off meeting with Debbie and Laurie, we had a really great conversation about the current craft community and what it means to be “DIY.” You see, ten years ago when so many of us were picking up our knitting needles for the first time or blowing dust off of our grandmother’s sewing machines, we were mostly single-subject kind of gals. We might knit, but that didn’t mean we were going to grow our own vegetables or make our own cheese. Slowly over the last decade, that mentality has changed, and a person who is willing (not to mention excited) to make her own sweater is fairly likely to also want to bake a pie, or cut her own bangs. And so, as we discussed articles from the magazine that could be repurposed in the book, we came to realize that so much of what Bust produces could be considered DIY: from removing stains to giving yourself a beehive hair-do to learning how to fix your bike to starting your own craft business. 

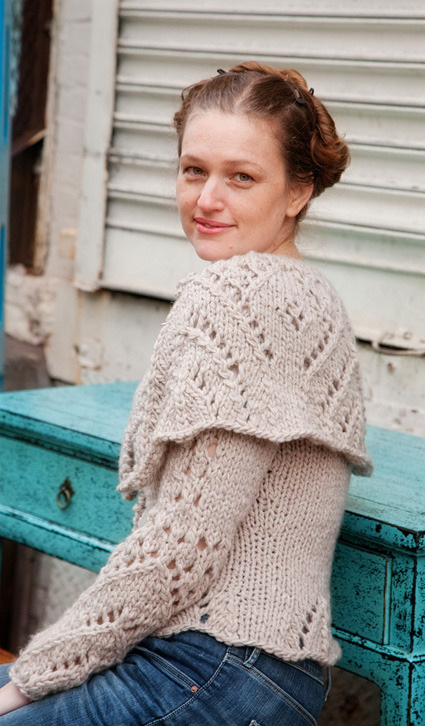
Brimming with excitement about this new kind of book, Melanie and I went back to the office and contemplated how many pages we would need to produce a book like this (the answer: 368), while Debbie and Laurie had their staff dive into the archives, flagging any articles that could be considered DIY, and developing categories, which roughly turned out to be these: home crafts, cleaning, gardening, sewing basics, repurposing clothing, jewelry making, hair-dos, make-up tricks, DIY soaps-n-scrubs, home remedies, cooking and entertaining, finance, travel, work-out tips, sex, marriage, birth, and death.

Phew! In a word, this project was feeling ambitious.

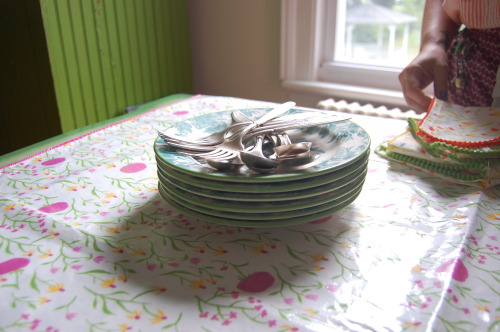
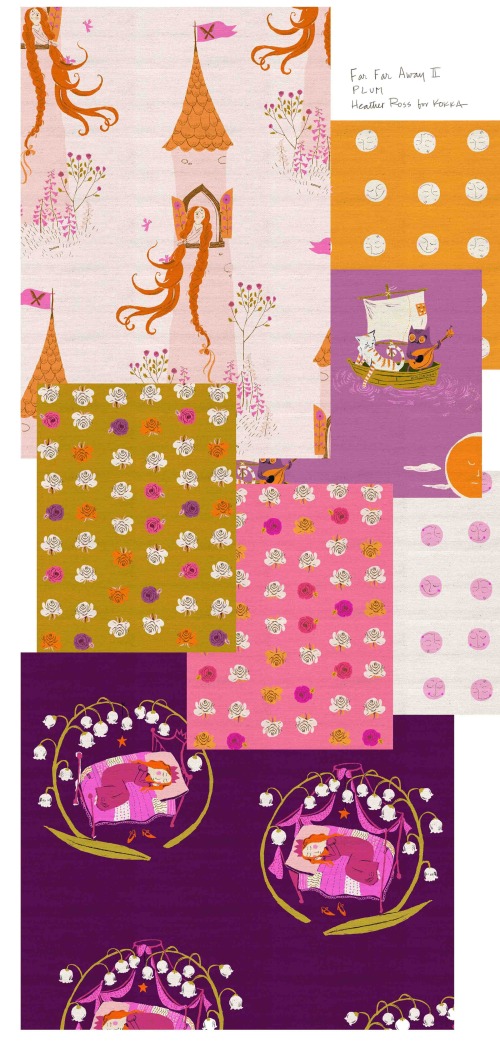
Once we picked our categories, we created an outline, and Debbie and Laurie dove back into the archives again, this time to extract all of the Word documents, photos, and illustrations. The writing styles from the articles were all over the map, so the first step was to retrofit the text so that it would have the same tone. After many months of wrangling this material, we handed all of the text and art files over to our graphic designer, Anna Christian, who flowed it into her design.

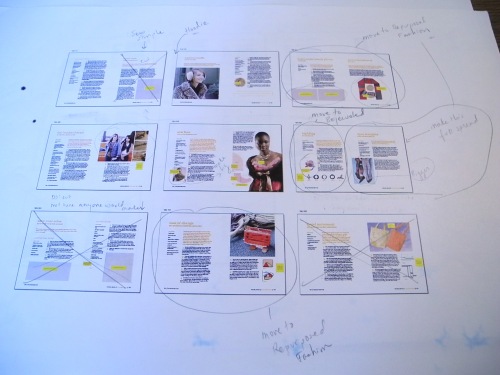
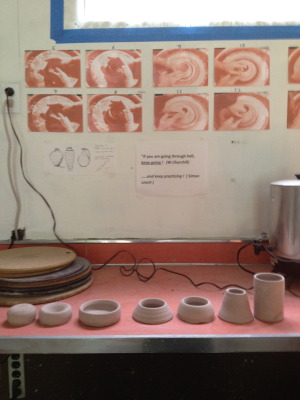
That’s when we discovered that the book was coming in at 520 pages (not the 368 pages that we needed it to be). I never in my life thought it would be possible to trim 152 pages from a book—after all, many of our books are  152 pages—but we rolled up our sleeves and hacked away at the book, moving things around, combining articles, cutting others. Above is just one “storyboarded” page from the book (each box represents two pages), which we used as a roadmap to tell the graphic designer what to cut and what to move.

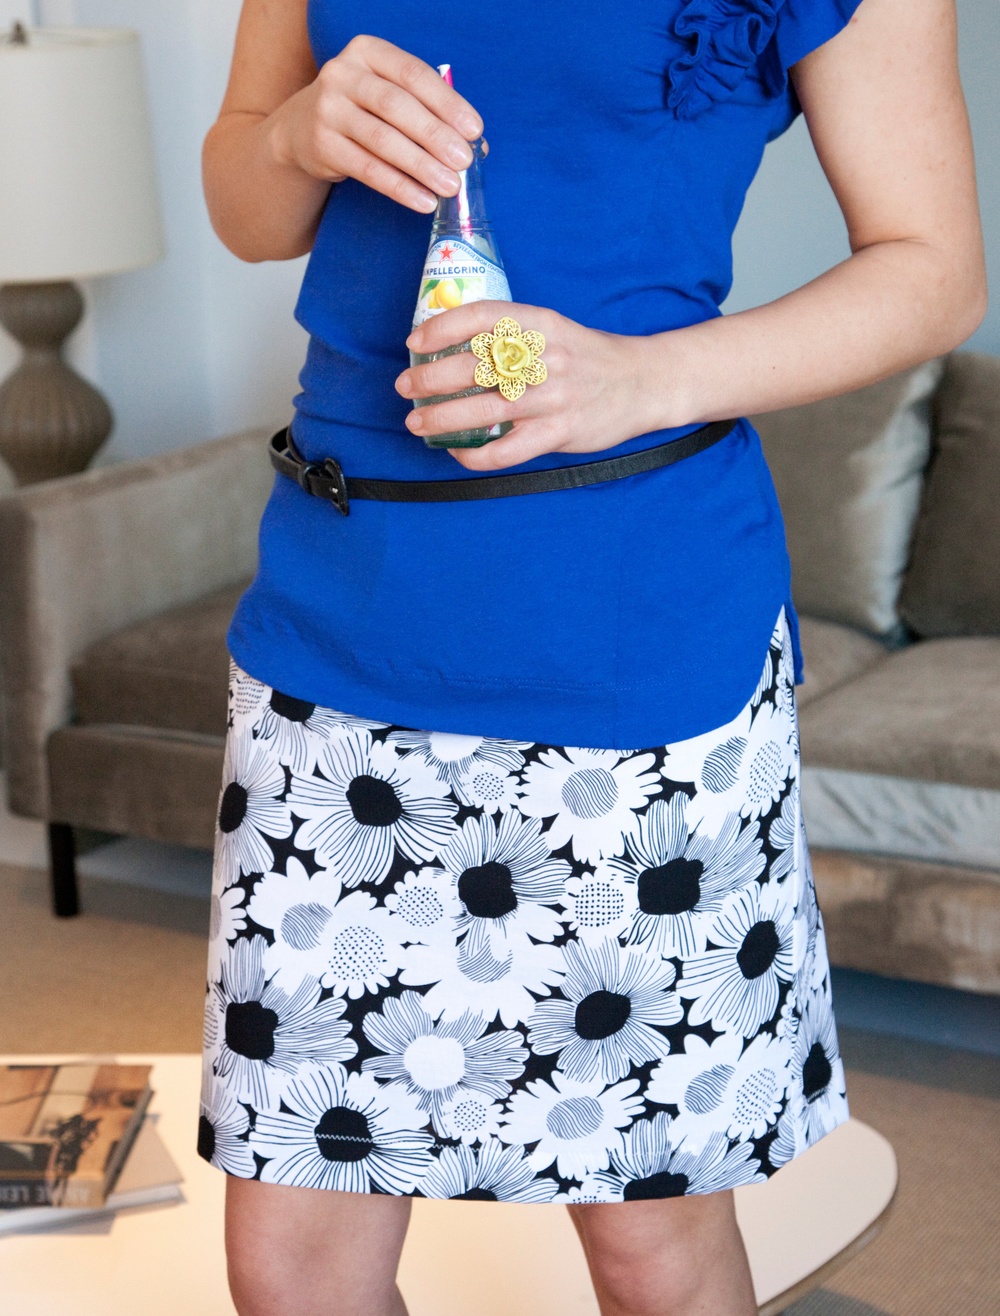
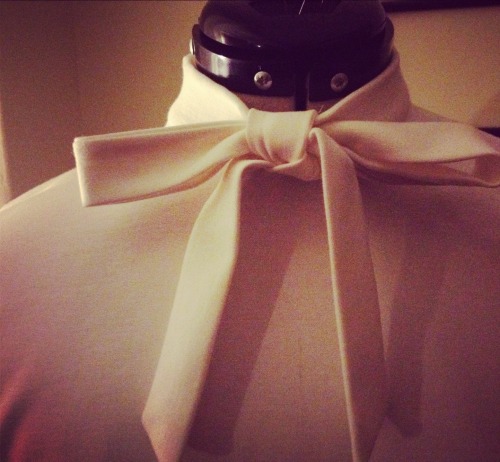
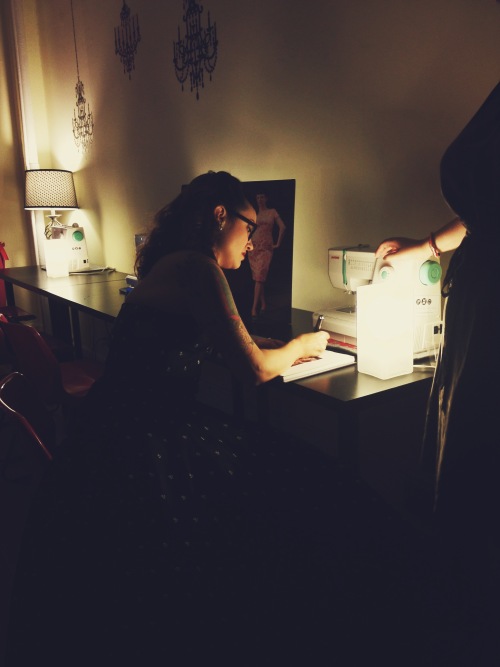
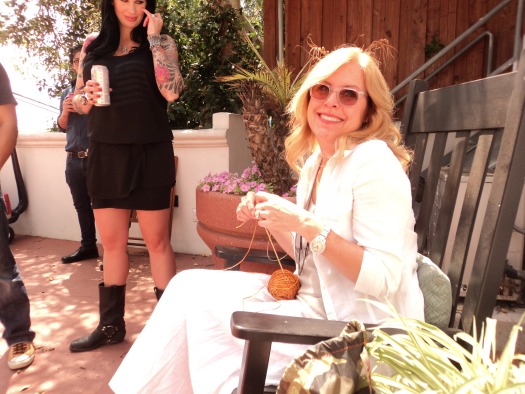
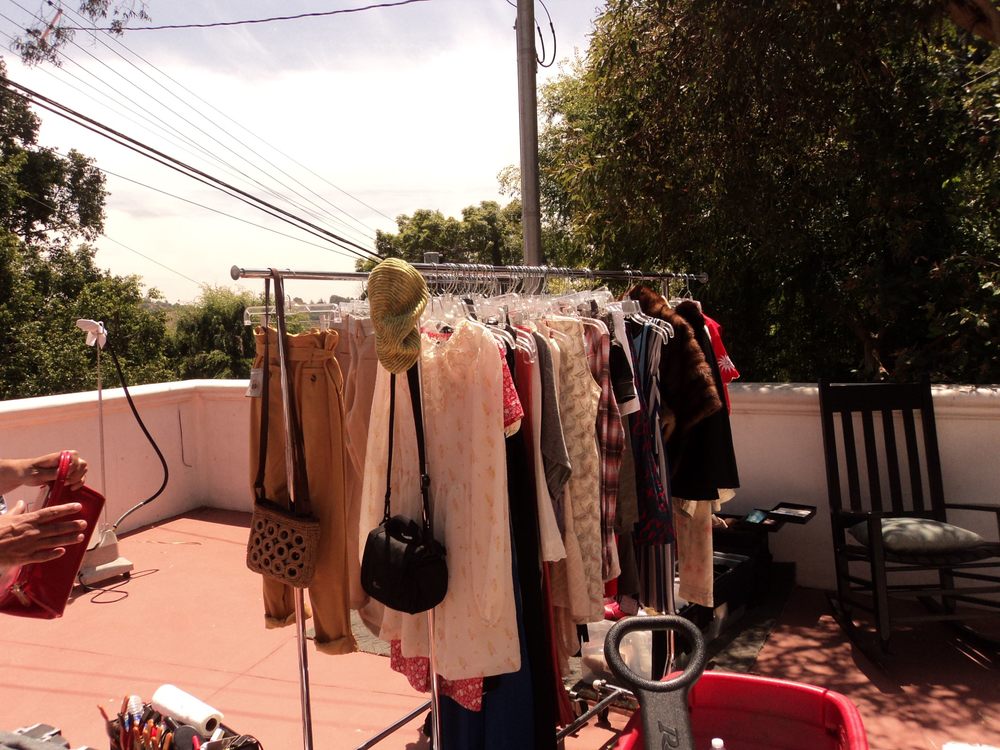
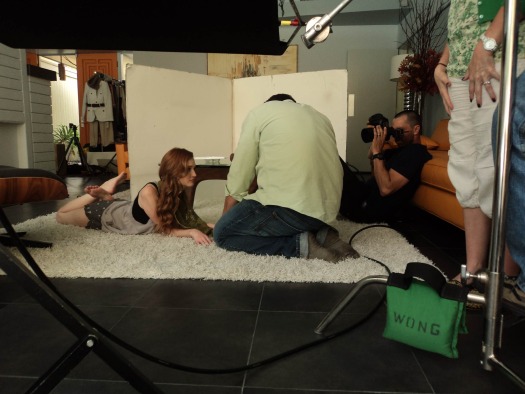
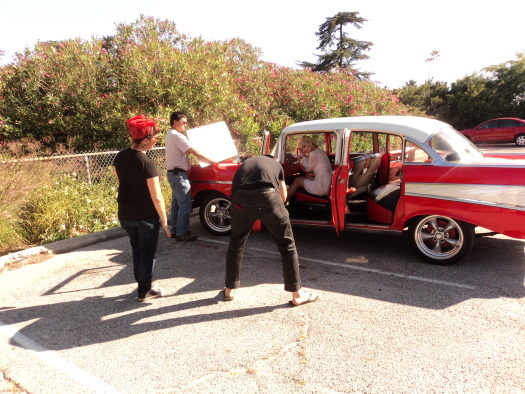
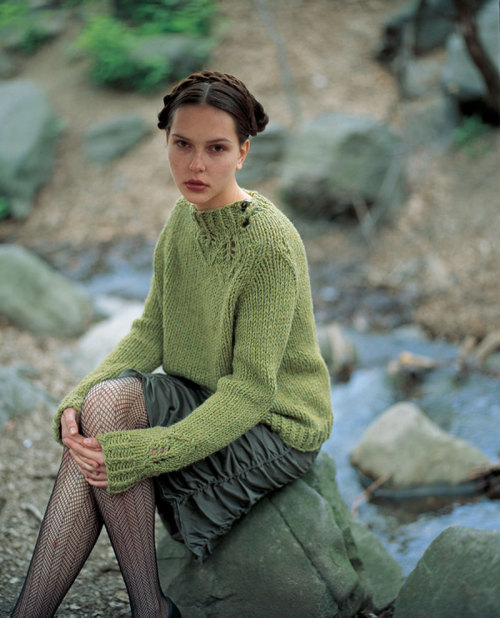
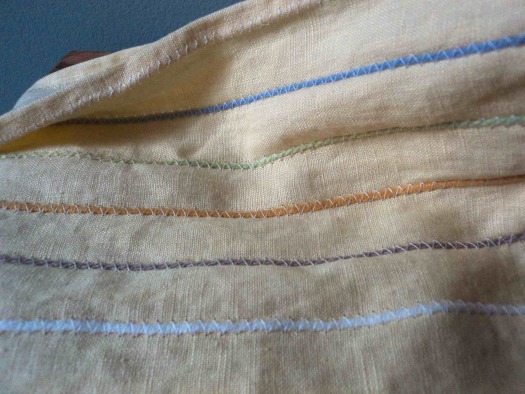
Some of the photos from the magazine were shot ten or more years ago, so we decided to give them a spruced up look. We picked about 25 projects to remake from scratch and had Marianne Rafter photograph them. Probably the most chaotic moment in the entire process of making this book was two days before the shoot when our sewist’s machine broke and she couldn’t finish the remainder of the projects. Debbie and I got on the phone and called every sewist we know in town (and many thanks to all of you who replied so quickly!). To make myself feel less stressed out, I went home that night and sewed three of the projects myself—a pillow sewn in the shape of a dachshund, a scarf made from sweaters, and this skirt shown above. Oh, the glamorous life of a craft book editor!


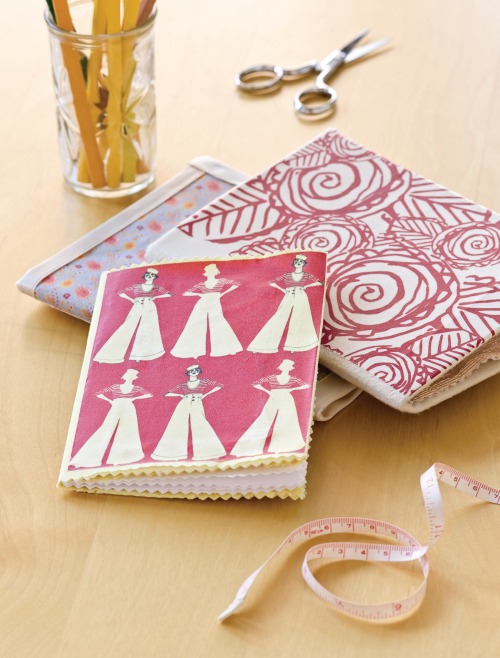
Despite all of the ups and downs creating this book, I must say, I was inspired every step of the way. I remember reading through the instructions for these cute fabric-covered sewn notebooks and thinking, hmmm…this looks so easy. That night I went home and whipped up a set of my own.

In the grips of winter, I made myself some sugar scrub using the recipe in the book, adding tangerine essential oils to add some cheerfulness.

For a friend’s party in March, I followed the instructions for giving myself a Frida Khalo hair-do, which garnered rave reviews from friends!

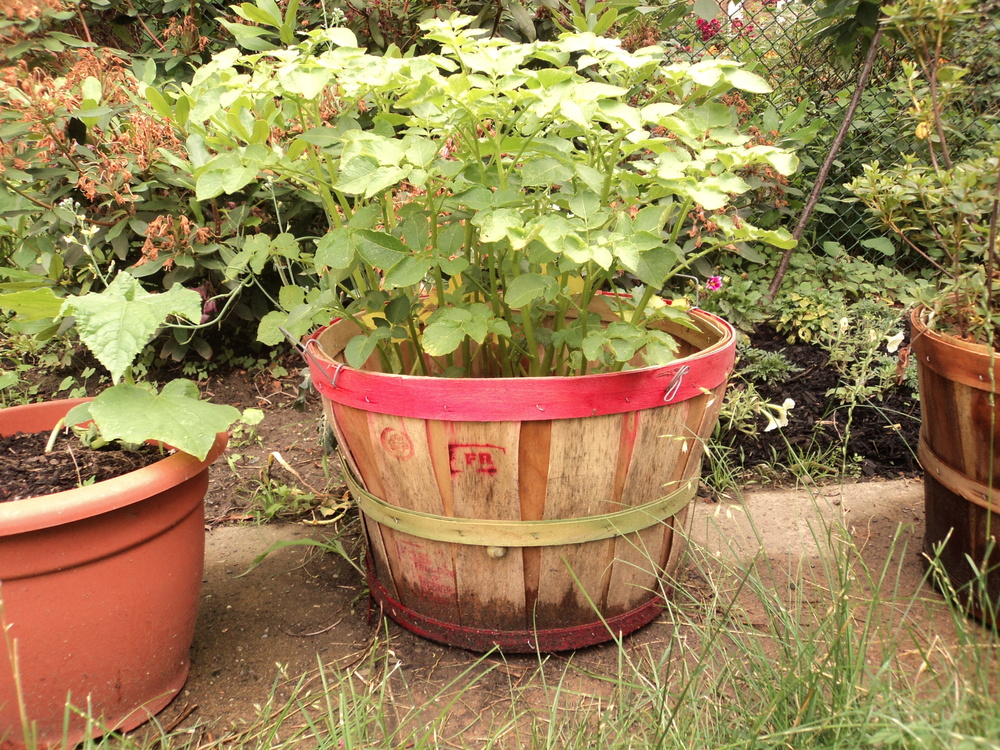
And that’s hardly scratching the surface…I’ve also made piñatas, flower hair-pins, and homemade butter. I've repaired my bra when the underwire poked through, and I've even grown potatoes in a bucket (yes, those are my potatoes shown above, and yes, potato plants look like this!) Not to mention, the Bust DIY Guide to Life even helped me plan my wedding. I was engaged while working on the book and was beginning to feel a bit stressed about the preparations. I remember reading this sentence in the “Planning a DIY Wedding” article and feeling greatly comforted: If you’re planning a DIY wedding, all you really need is an officiant, the papers, and the love of your partner. Everything else—and we mean everything—is totally optional.

So, if it isn’t totally obvious, I became pretty passionate about this book during the process. It was a primary focus for STC Craft between January of 2009 and May of 2011, and we couldn’t be prouder of how it turned out. To check out more of the images from the book, be sure to check out the gallery here. But really, nothing quite matches the experience of flipping through it yourself—there is sure to be something (or a dozen things) that you will want to make, learn, or grow for yourself—so be sure to preorder a copy or take a look when it hits bookstores this October!


My Diary of a Wimpy Kid Repurposed Tee


Two years ago, Amulet Books (part of Abrams Books, just like STC Craft is) released the fourth book in the Diary of a Wimpy Kid series--Dog Days. The Abrams marketing department went all out promoting the book, even organizing a cross-country ice cream truck tour. One day that summer, all Abrams employees walked into their offices to find a bright yellow Dog Days T-shirt on their desks. Just a little gift to get us excited about the book. And truly, I thought it was a very sweet gift. But deep down, I felt a little bit guilty because, well...I don't wear T-shirts. Pretty much ever. Let's just say that the boxy sleeves and straight waist of a standard tee don't do me any favors. So I took the shirt home and it sat in a drawer. I thought to myself, maybe I should hang onto the shirt and take it to Antiques Roadshow in 40 years when it will have become a true collector's item. But then, as summer 2011 rolled around, and I came up with an even better idea. Being a craft editor, I was, in fact, a little embarrassed that I hadn't thought of it earlier. I decided to cut up that boxy tee and turn it into a cute girly tank.

I first considered using the corset pattern from Alabama Stitch Book, but those tanks require cutting up an extra-large shirt and the Dog Days T-shirt was a trim ladies medium. Instead, I reached for a fabulous all-purpose T-shirt transformation book--Save This Shirt--which was, incidentally, the very first STC Craft book I ever helped edit.

I settled on the design for Fit to Be Thai-d, a tank with a high front (so I could preserve the Dog Days logo), and an ornate laced up back. One of the first steps is to spread out your T-shirt, place a tank top that fits you really well on top of it, then trace around the edges. Once you've transferred the shape of your tank, you pin along the shoulders and sides and stitch along the tracing lines on a sewing machine.


I realized about halfway into making the shirt that I wasn't going to have enough material on the sides (or the bottom for that matter) to do the fancy lace-up ties in the back. Yes, it's true, even craft book editors sometimes skim the instructions and make silly mistakes. But, never one to be discouraged, it was at that point that I strayed from the pattern and improvised! I trimmed away the excess material from the neck, shoulders, and sides, and tried on the tank to check the fit. The top looked nice, but I didn’t like the way it fit at the hips. I wanted it to flare out a bit more like a tunic. So I cut slits up the sides and then cut out two triangles of fabric from one of the sleeves. I sewed the triangles into the slits, and voila, instant flares. And now I have a lovely tank to wear during these last long dog days of summer...perfect for barbecues, picnics, water balloon fights, naps in hammocks, and of course, eating ice cream cones.


Shooting Heather Ross's Book at Melanie's House

Over the years I have worked at STC Craft, many photos for many of our books have been photographed at Melanie’s house. (When I’ve seen these photos after the shoot is finished, I’ve actually found myself thinking “and now it’s really a Melanie Falick Book.”) From Sewing Green to Knitalong to Weekend Sewing, Melanie’s home makes numerous appearances. And if you look closely, in almost all of these books, you’ll even see the infamous grass-green cabinet. (It’s shown above on the lefthand side, though the cover of Sewing Green is where the cabinet makes its most prominent appearance.)

And so, as we set out last week to do a final day of shooting for Heather Ross’s upcoming book, Heather Ross Prints (due in stores in fall 2012), we decided to keep things easy and head up to Melanie’s house in Beacon.

One thing that is great about shooting at Melanie’s house is that she has loads of antiques and interesting home wares, many of which we integrated into the shots. For instance, the Anthropologie dishes in the photo above are shown along with her grandmother’s silver--together they make a fabulous not-too-matchy match with Heather’s tablecloth and napkin projects.

But of course, if you know Melanie at all, you know that she is a Tab soda fanatic. And so, along with the antiques, we had to give Tab a cameo in a detail shot of the sarong project (the sarong is on the chair, just out of frame). I snapped this low shot while the real shot that will be in the book was being set up.

While every person at a photo shoot plays a key role, from the photographer (of course) to the person who goes to pick up the food for lunch (a VERY important job), our stylist, Karen Schaupeter, was a huge player. From keeping us on schedule to beautifully matching Heather’s prints within a setting, Karen moved quickly and kept things fun. In the photo above, she’s actually texting while ironing—talk about a multi-tasker!

As the stylist, Karen is in charge of bringing every possible prop we might need that day and organizing it so it will be at the ready. Shown above is just a small portion of the props spread out amongst the projects.

And here are two adorable pincushions that Heather provided as possible props. They may not have made it into the book, but they did make it onto the blog.

Shooting in a house can give you a world of options, but it can also have its limitations. For this shower curtain shot, Karen, the stylist, and John Gruen, the photographer, had their work cut out for them. Not only is the bathroom so small that you can’t possibly shoot a shower curtain from inside of it, but there wasn’t even a shower rod (only a tub). With some lighting poles and studio magic, we were able to fabricate a curtain rod and get just the right angle out in the hallway, producing what turned out to be one of our favorite shots. In fact, we liked the light in the bathroom so much that we wound up moving a table in there and shooting some still lifes on it.

And of course, on a photo shoot there are three things that you’ll see people doing a lot: checking their phones, snacking, and huddling over the camera to see how the shots are turning out. In this photo, Karen, John, and I gather around the camera to flip through the apron shots. And that’s right, I’m the one wearing the apron. (Again, when you shoot at Melanie’s house, you use the props on hand—including people.)

But the best part of shooting at Melanie’s house, aside from the great hospitality and the unlimited Tab, has to be her loyal companion, Molly—one of the sweetest dogs I’ve ever met. I love how you can barely see her tail in this photo because it’s wagging so happily. Aside from a bit of dog hair that needed to be lint-rolled off of the projects now and then, there’s nothing like a sweet pup to make a day of shooting that much more fun.

Designing Fabric with Heather Ross--Lucky Me


Last week I hit the jackpot when it comes to being a craft book editor. I learned how to design my own fabric with none other than Heather Ross. We were working together on her next book, Heather Ross Prints, which we will publish in Fall 2012. While Weekend Sewing, Heather's first book, was a tour de force full of gorgeous, doable sewing projects, her next book will focus on all manner of crafts that can be made using fabulous repeating designs, hers (see sampling below) and your own (just keep reading). 

One of the first chapters in Heather Ross Prints is dedicated to teaching crafters how to make their own repeating designs using artwork of their making and/or choosing. Up until last week, this section of the book was making Heather and I feel both nervous (“How exactly will we do this?”) and excited (“It will be so cool if we can do this!”). So, once Heather had written her first draft, I printed it out, wrote out a million notes and questions, and headed downtown to Heather’s apartment. After being treated to an amazing homemade lunch—Heather is 8½ months pregnant, and so, according to her, lunch is a “big deal”—we sat down at the computer and started reviewing the manuscript.

About five minutes into the process, I turned to Heather and said, “I really think it would be most effective if I tried to create my own repeating design following your instructions…you know, to see if it works.” And so she handed over a sketchpad and said, “Sure, what would you like to draw?”

As she warned in her manuscript, this would be the scariest moment of the design process. What should I draw? Can I draw? These questions were running through my head. But before I committed to just drawing a simple circle or star, I thought, I’d like to try to draw my favorite animal: a bear. With some artistic tips from Heather regarding the shape of the nose and the hulk of the belly, I suddenly had a bear (shown below alongside Heather's bafflingly cute donkey.)

Once the sketch was done, we scanned it into the computer and Heather taught me how to turn it into an illustration. It was my first time drawing with a stylus, and true to another warning in her manuscript, it was pretty awkward. While coloring in my bear, I could not stop laughing every time I got near the “outline,” knowing that mine would be super wobbly. But after some practice, I got the hang of it and could make fairly controlled strokes.

After about an hour or so of coloring in the background, playing with different hues, and shading some areas of the bear, we saved the file and uploaded it to Spoonflower—a site where you can print your own designs onto fabric of your choosing and buy it by the yard.

Next we played with the repeating design.

Seeing my silly little bear design up on the screen felt so empowering. It was unbelievable that in just an afternoon, I was able to use my humble artistic skills to create a fabric design that I will proudly use to make pajama bottoms for the whole family next Christmas. How cool is that?

Having gone through the process myself now, I feel confident that this is something anyone can do, and I personally can't wait to sit down and do more. But for now, I should probably get back to the editing.

Thanks again, Heather!


Custom Knits Photo Shoot

What you see when you look at a knitting book is the finished product: patterns that have been exhaustively reviewed; graphic design that has been overhauled nine times until every detail—from fonts and palettes to captions and dingbats—is exactly right; and beautiful photography, which is one of the most challenging (and important) aspects of the book-making process. Photography makes the first impression and sets the tone for the whole presentation. And that, of course, is why photo shoots can be so stressful—for the author, for the photographer and stylist, for the editor, for everyone. Everything you’ve been working on has built up to this moment, when every participant must tap into his or her most creative and fashionable resources, work together as a team, and record the garments in a matter of just a few days. And if you don’t get it right? Well, you either decide you can live with it or you find the time and resources to shoot it again. But the underlying tone of every photo shoot is this: Get it right.    

So when it came time to photograph the garments for the third book in the Custom Knits series—a book that will be entirely devoted to accessories—I decided to fly out to Los Angeles and station myself on set. The role of the editor on a photo shoot is fairly straightforward: Make sure that the knits are being photographed from every important angle, make sure that the right side of the garment is facing front (really!), and regulate anything that may look silly in the end. Like shiny pants on men. Or a model wearing yoga pants and a luxurious bouffant up-do. But most importantly, an editor must do all of this while giving the creative people space to do their thing.

On the first day of our shoot, our lovely, talented, and hilarious author Wendy Bernard (see above) pulled out her needles and started working on a fingerless mitt. We had forgotten that we needed one more basic example of a glove type in the book, and so there she was, knitting a mitt that would be photographed the very next day. Red Dodge, our fabulous makeup and hair stylist, looked on with a sort of disbelieving amusement.

Our amazing stylist, Mark Auria, pulled out all the stops when it came to wardrobe. Mark stationed his racks of clothing—a mix of vintage dresses and lovely new items—on the porch at the house where we shot the first day, and between shots we would run to the garment racks and play with ideas, oohing, aahing, and vetoing until we found the perfect outfits for our darling models.

When you look at the final photos in a book, you’d never guess that there was a whole crew of people surrounding the model. Below are some of my behind-the-scenes shots: photo assistants holding reflectors, the stylist on hand to adjust the garment if it starts to go wonky, Wendy or I nearby to make sure the stitch pattern is showing, the makeup-and-hair whiz on hand to fix errant locks, and always someone in the background munching on a cookie, slurping a Coke, or fussing with a cell phone.

In the photo above, Mark, the stylist, adjusts the model’s scarf, as Joe Budd, our photographer, checks out light levels.

A group assembles around a 1950s Chevy (above) as the model drapes herself over the  steering wheel for a coy beret shot.

After taking the photo of these legwarmers (above), we decided that the white wall behind her was too cold and bare. So we moved the whole set-up across the patio so that we could use a wall with a little brickwork.

One of the most memorable days of the shoot was in Marina del Rey, out on a sailboat. It wouldn’t be a Custom Knits book without models in bikinis wearing knits, right?

It was a chilly day by California standards, with lots of wind creating some mighty big waves. Our model was an absolute pro, so when you look at the photos, all you can see are her beautiful smile and Wendy's shawl in the golden glow of sunset—thankfully, you don't see her goose bumps or her trepidation about the boat tilting wildly from side to side.

Between shots, she wrapped herself up in a big, comfy sweatshirt and Joe, the photographer, showed her the photos so that they could talk about facial expressions and best angles before shooting the piece again.

For the shot below, inspired by the cover of the May 2011 Anthropologie catalog, we went below deck. I love the dramatic way light is filtering through the shawl.

Once we set out to sea, we had quite the rollicking time. Amidst the huge waves, a bikini-clad model wearing a poncho hung onto the boat for dear life, and out of ten people on the boat, only three of them turned green during the ride. Oh, what we won’t do for a really great photo! And while I won’t share with you that particularly epic poncho shot just yet, I will share this photo of me and one of our male models (or M.P., a name we made up for the Custom Knits books which stands for “male prop”), laughing and laughing because we can’t believe how big the waves are and how much the boat is rocking.

When it was all said and done, we couldn’t have been happier with our gorgeous shots. And we can’t wait to share them with you in a couple of seasons! In the meantime, keep your eye out for the next beautiful book in the series—Custom Knits 2!—which is due to hit bookstores this October.

Full Circle with Loop-d-Loop Lace

About six years ago (or was it seven?), I quit my job as an editor of physics books to pursue a more creative life. I had many ambitions, including finishing my novel, drinking more coffee, writing more songs, knitting a lot, eating breakfast with friends frequently, and trying to publish magazine articles. And so, it was on one of these lovely unemployed afternoons that I found myself at Borders in San Francisco's Union Square perusing the magazines. Stacked nearby on a rack all of its own was the book Loop-d-Loop by Teva Durham. To be honest, I was not immediately sure that it was a knitting book. I had never really seen anything like it before. The styling was so other-worldy, yet absolutely pretty and captivating. The book's paper was so thick! The dimensions were so large! It was the first knitting book I had ever seen that felt more like a coffee table book—an art collection, really—than something that a person would use in a utilitarian fashion (i.e., to knit from). Little did I know that this would be the beginning of my obsession with high-quality craft books.

Through a series of amazing incidents, fateful coincidence, and just plain luck, I found myself in New York City two years later, working as an editor at STC Craft (Teva's publisher). When I first arrived, Melanie and Teva were just wrapping up Loop-d-Loop Crochet, and were just beginning to talk about doing a third book, Loop-d-Loop Lace—a book that I wound up editing. It's rather surreal when you can actually recall the moment you first saw a designer's work—where you were, how it felt, the impression it made on you—and then later you find yourself working side by side with her.

As we planned the photo shoot, Teva and I sat in my office with the book’s amazing photographer, Adrian Buckmaster, admiring the garments and contemplating abstract hairstyles and wondering: To loop, or not to loop? The first book was chock-full of interesting hairstyle choices, which, over time, became a signature of Teva's brand. We laughed, because I have been looping my hair up into twists not unlike the model shown above (from the first book) for years. I had to wonder if I had been subconsciously inspired by Teva's first book. To my surprise, when Teva published a pattern called Lady Lovelace on Knitty.com a few months ago, she asked me to lend my hair twists to the photo shoot. I agreed, and after a quick and chilly shoot with Marianne Rafter (the result of which is shown below), here we are. Full circle.

Loop-d-Loop Lace picks up where the other books in the series left off. We wanted to maintain the edgy, modern feel from the first book, but integrate a slightly softer touch to complement the pretty lace stitches. As you can see, we’ve continued the loopy hairstyles (as shown below), but we kept them a bit tousled to go with the feminine styling. And while the garments may have a contemporary aesthetic, Teva’s thoughtful essays and pattern introductions root the lacework in history, reminding us where lace came from and why we still love it today. To see more images from this pretty book, click here.


From The Repurposed Library: A New Sewing Box

If you’re reading this blog, you are most likely a person who A) loves crafts, and B) loves books. If you meet both of those criterion, then chances are you'll be interested in one of our newest STC Craft titles: The Repurposed Library.

When we first acquired this book nearly two years ago, e-readers were new on the scene. The Nook may not have existed yet, but we could see which way the wind was blowing. The Repurposed Library felt like the perfect response to a tech-savvy world that’s changing before our eyes. Both ironic and beautiful, The Repurposed Library presents craft projects to make, literally, out of old books, lifting obscure tomes off of dusty shelves, and putting them in a new light. 

I edited this book and worked closely with the author, Lisa Occhipinti, from beginning to end. When I finally decided to make a project from the book, I was drawn to so many things—from the decorative book bursts made from folded book pages to the shelves made from a sturdy stack of drilled hardcovers—but the sewing box seemed like an excellent choice for me since I love to sew and am constantly leaving my notions about. Shown above is the inside of my finished sewing box, and below is what it looks like when it's closed.

I must say, the hardest part of making this project was picking out the book. As a book lover, it is very hard to find a book you feel okay about putting under the knife. Especially with old books, there’s a certain amount of reverence—a sense that it has been passed through many hands, perhaps loved, perhaps not—and that you are now the keeper of this book in a vast "world library." So, I’m not going to lie: I bought four used books before I found the one I felt okay about transforming into a sewing box. Luckily, Lisa provides us with a very helpful section on selecting books—from how to identify first edition and rare books (which you should not cut up) to the importance of evaluating sentimental value—so when I found the book I wanted, I felt good about my choice.

I chose an old Reader’s Digest Condensed Book from the 1950s. The books in this series all have wonderful, decorative hardback covers hiding beneath their jackets, and almost no value whatsoever. As an added bonus, there are cute little illustrations throughout, which I’ve been cutting out and gluing onto homemade cards (shown below is a card I sent to my mom for Mother’s Day…)

The sewing box project couldn’t have been easier. To get started, you simply remove the pages from the book with two slices of an Xacto knife down the inside spine (the pages will all be glued or sewn together, so they come out in one big chunk). Then you measure your balsa wood, which you can find in sheets at craft or art supply stores, and trim it to size with an Xacto knife (the wood is very soft and easy to cut through). Then comes the fun part: You get out your hot glue gun and glue the compartments in place! I managed to complete all of these steps, beginning to end, in under two hours.

If you’d like to try your hand at making the sewing box, download the instructions here! And if you’d like to see more projects from the book, click here.

Stitch Magic Scarf


Stitch Magic: A Compendium of Techniques for Stitching Fabric Into Exciting New Forms and Fashions is one of the new books on STC Craft's spring list, and it's a wonderland of fabric manipulation--how to fold, twist, pleat, and pucker fabric, then stitch it down into the most mesmerizing creations. The first time I set eyes on the photos from Stitch Magic, I'll admit to being a bit intimidated, but once I started reading through the directions, I was shocked to discover that these techniques are actually quite simple to execute. Some may take a little time to create, but the looks you can acheive with these simple twists and turns are so incredible, the time spent is absolutely worth it.

 Stitch Magic is divided into nine sections by technique--cut shapes, folded shapes, pleating, pintucking, quilting, cording, hand-stitch marks, smocking, and special fabrics. Included in each section are directions for the technique, with lots of of ideas for varying it (all shown in photos), plus projects.

The technique that caught my eye first was cording, which is essentially done by laying a piece of cord on fabric, holding it in place, then stitching it down with a wide zigzag. You can swirl the cord to make a meandering trail, hold it down straight and narrow, or twist the cord every few inches to make a loop that hangs freely from the fabric (as shown on this pillowcase.) 

Last week I decided to use the cording technique to make a long scarf that I could wrap around my neck several times. Since I'm a knitter, too, I have a ton of stash yarn on hand. So I used some of my leftover yarn scraps for the cording, and I of course couldn't stop at just one color--I had to have blue, green, gold, light brown, and white.


One of my favorite features of the finished scarf is the white zigzag stitches on the reverse side (below). The cording beneath creates ridges on the back, and the white slanted stitches against the yellow provide glints of sheen and a bit of texture.

And here I am wearing the scarf  this weekend. While it may not be perfect springtime weather here in New York, I did manage to find some time yesterday to sit in the park and bare my arms in the sunshine. And with the scarf draped several times around my neck, I was nice and cozy, daydreaming of the leaves that will soon be on the trees.

As you can see, the fun of Stitch Magic is imagining what you can create with each technique. The book includes a number of projects to get your creative juices flowing, but it is also intended to inspire you to strike off on your own. You can add a little embellishment (along the hem of a skirt, perhaps?), or embark on a larger endeavor (wouldn't it be lovely to create an entire quilt top using this cording technique?) The choice, of course, is up to you!

To see a gallery of images from Stitch Magic, click here.