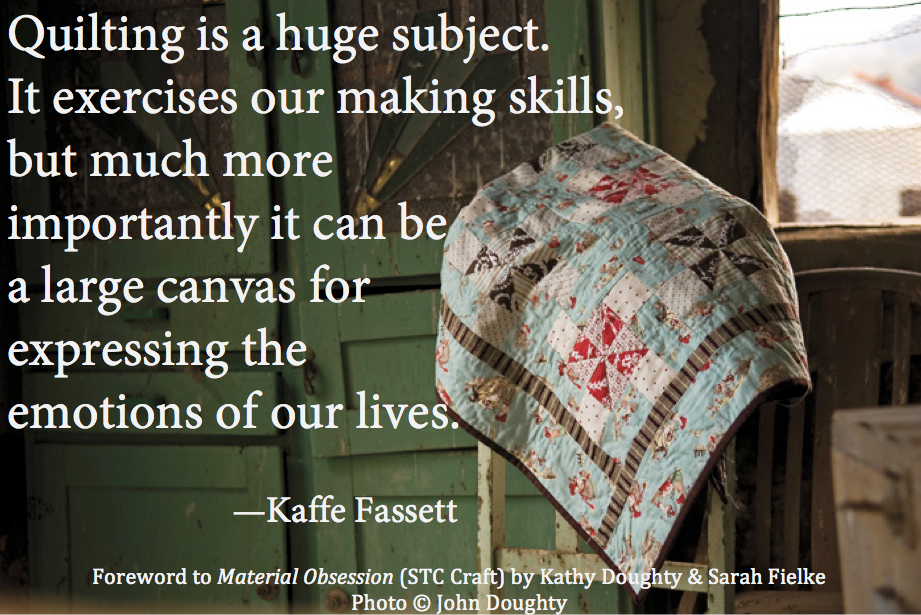
Once a week, we share some of our favorite inspiration to get your creative juices flowing for a weekend of creating. Today's offering comes from Kaffe Fassett, from the foreword to Material Obsession by Kathy Doughty and Sarah Fielke.

a vibrant collection of inspiring and instructional books specializing in knitting, sewing, quilting, drawing, and other “maker” genres.
Once a week, we share some of our favorite inspiration to get your creative juices flowing for a weekend of creating. Today's offering comes from Kaffe Fassett, from the foreword to Material Obsession by Kathy Doughty and Sarah Fielke.
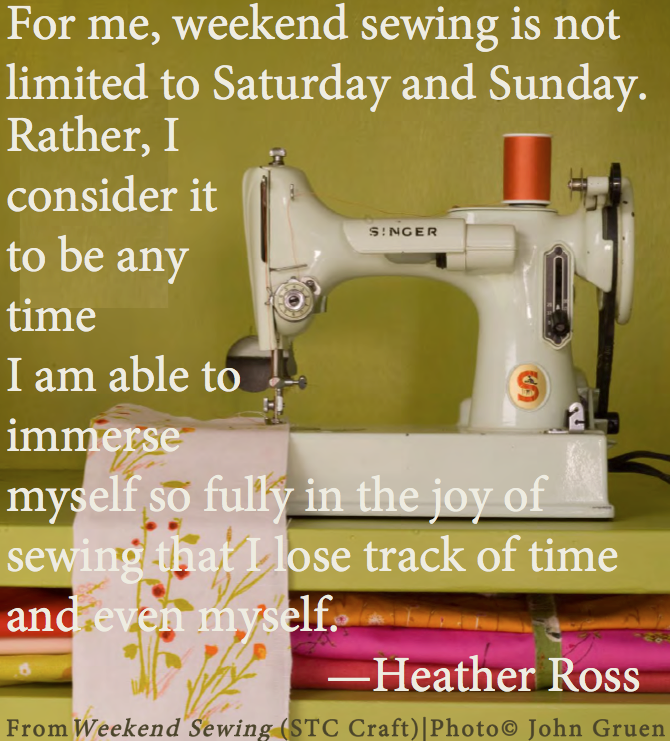
Once a week, we share some of our favorite inspiration to get creative juices flowing for a weekend of creating. Today's offering comes from Weekend Sewing (now also in paperback) by Heather Ross.
Have a happy, crafty weekend!

2013 will see a hallmark event in the craft world: QuiltCon, the inaugural conference and show of the Modern Quilt Guild. The event will be held in Austin, Texas, from February 21-24. While there are many wonderful quilting events out there, this will be the first to focus on “modern quilting.”
Today QuiltCon released its catalog, and it's filled with exciting events and workshops. Click here to check it out. Although you can't officially register until August, from what we are hearing anticipation is very high so it's a good idea to sketch out your plans now (How about meeting up with quilting friends from around the country for four days of fun and learning?) and then sign up as soon as registration opens (and before the classes and events you're most excited about sell out).

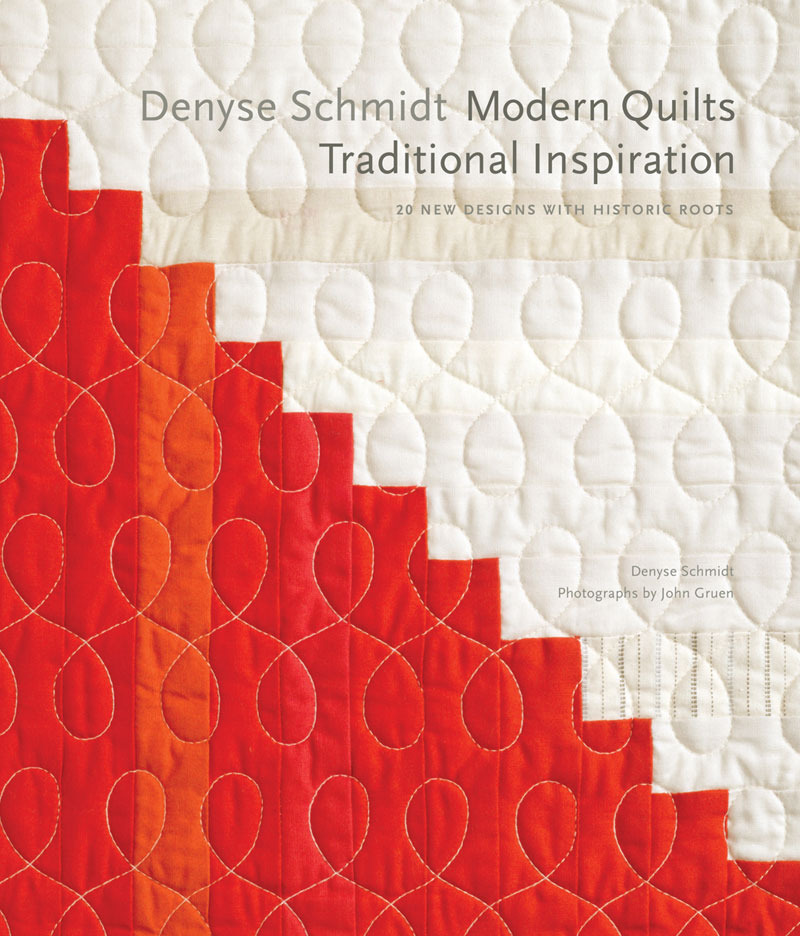
We're thrilled to report that Denyse Schmidt, author of the STC Craft book Denyse Schmidt: Modern Quilts, Traditional Inspiration, will be the keynote speaker. Denyse will also be teaching workshops and presenting a special exhibition of her gorgeous quilts. STC Craft publishing director Melanie Falick will be speaking on a panel about getting your work published.
Be sure to check out the QuiltCon website if you’re interested. Hope to see you in Austin!
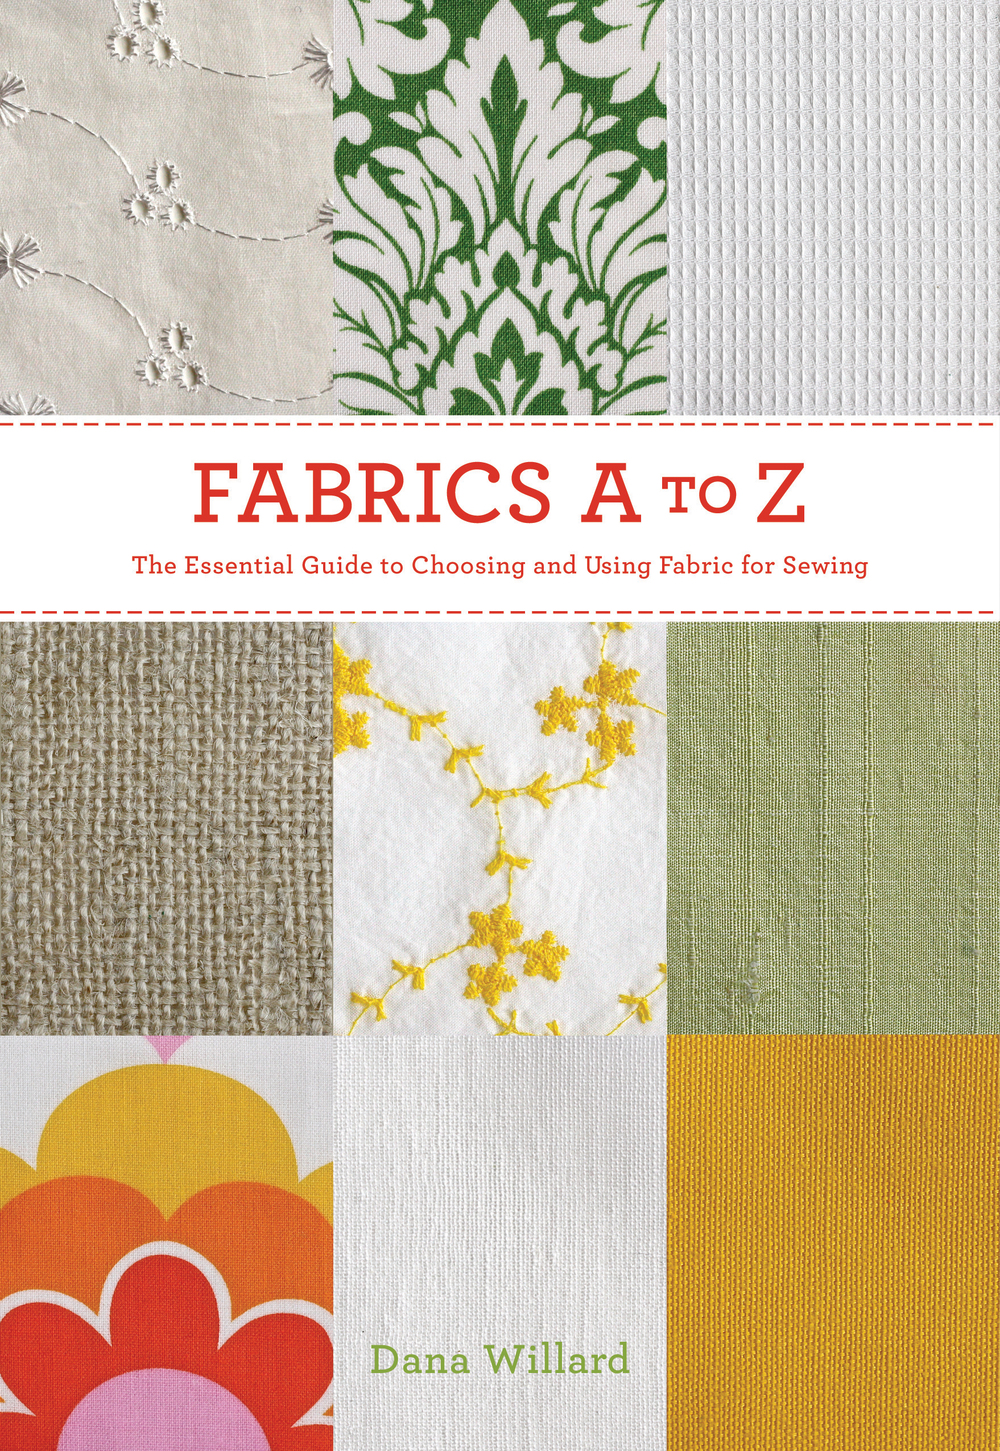
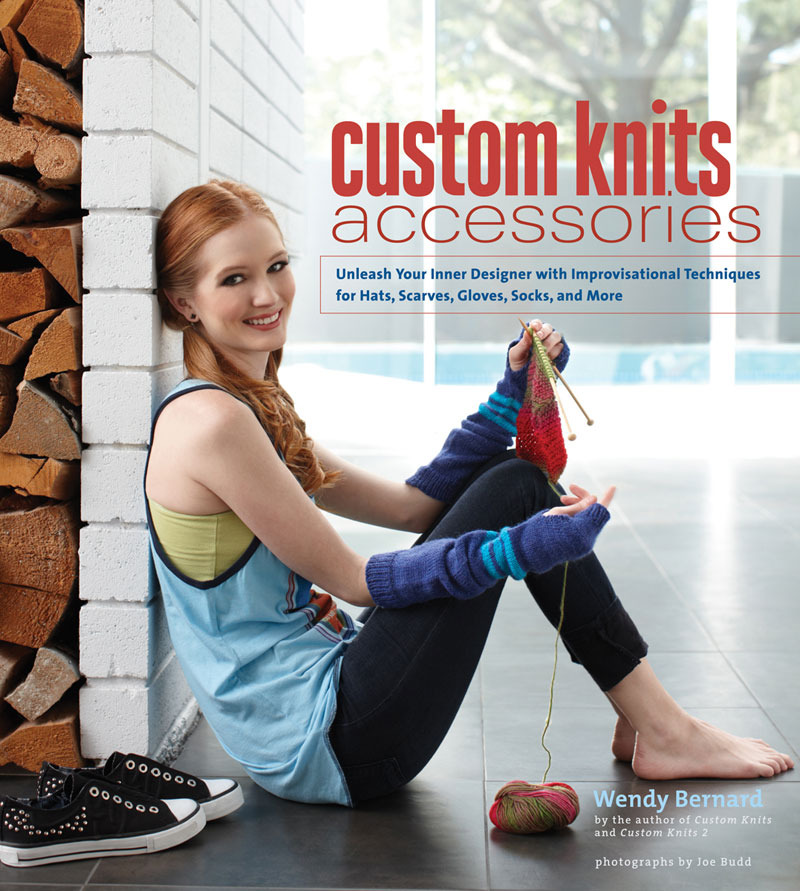
Sometimes a book cover speaks a thousand words!
These 3 new books are in stores now:


In stores in April
In stores in May

In stores in May

Denyse at work in her studio in Bridgeport, CT
One of the best parts of my job is meeting fabolously creative people and then having the opportunity to work with them (pretty much a dream come true!). I was thrilled to meet quilter Denyse Schmidt a few years ago (introduced by our mutual friend and another STC Craft author Heather Ross). I am even more thrilled and proud today to announce that we have just published Denyse's new book, Denyse Schmidt Modern Quilts, Traditional Inspiration: 20 New Designs with Historic Roots. Denyse is one of the hardest-working and most passionate people I know. When I think back on the year and a half she spent working on this book, the phrase blood, sweat, and tears comes to mind, though I'm not sure she literally put blood into it (she never mentioned any slips with the scissors). However, I can say with full confidence that she put love (for the quilts of the past and the new ones she created), sweat (over the hard work), and tears (because she wanted it to be perfect) into it. And the result is, well, as perfect as a book can be. Recently, both of us feeling a little more relaxed than we were a few months ago, sat down for this Q&A:
Describe your book in 3 or so adjectives.
Beautiful, inspiring, a tribute to the quilters whose creations sparked my career.
What do you want people to take from your book?
I want them to feel inspired and to learn something. I want them to feel confident that they can take on something a bit more challenging than they have taken on before.
What was your favorite part of the bookmaking process?
I loved doing the research, going back through my files and old books and revisiting the quilts that were made a century ago, the ones that made me want to start my business in the first place. I feel driven to help people think about quilting in different ways, to see how quilts can be really modern, and to wipe away any musty, dusty stereotypes.
What was your favorite part of designing the quilts for the book?
I loved the early part of design phase when I felt like I had time to think a lot about what each quilt could look like, when I considered different fabrics, weighed all of the possibilities, and then narrowed down the choices and started making decisions.
I've been to your studio and know that you don't usually display finished quilts; I've only seen works in progress on your design wall. Why is that?
We don’t have a lot of room in the studio and I like to keep the walls clean except for the task at hand so I can really see what I’m working on. I usually don’t have the luxury of time to celebrate each accomplishment, and this is compounded by my tendency to always be focused on what’s next. So, finished work doesn’t have much of a chance to linger!
Do you display or use any of your quilts at home?
Right now I have two special-edition quilts on my beds at home: Tangerine Poppy in my room and Bone Snow in the guest room. I’ve been pretty attached to these for a while, but I’d like to start rotating in some new quilts.
I remember you telling me that you hand-stitched the Postage Stamp quilt and really enjoyed the process. What did you enjoy about making it?
I’ve always envied knitters because they can sit anywhere and knit and talk to people. If you use a sewing machine, you’re sort of tied to it. My machine is in the studio, so any sewing I do on it feels like “work.” It’s also a bit loud. Hand-sewing feels more reflective and quiet. Most of the quilts I do are quite large, but the Postage Stamp quilt is small and I could easily hand-piece it at home while watching a favorite PBS series. The blocks that make up Postage Stamp are tiny–each one is comprised of nine 1-inch squares–so I felt a sense of accomplishment as I went along and it didn’t take long to finish. A “scrappy” quilt like this is so much fun because you get to include tons of fabrics from your stash. Like most quilters out there, I have an extensive collection of prints, and I really enjoyed getting to use so many of them in this little quilt!
 Denyse's beautiful book. To see images of some of the quilts in it, including Postage Stamp, click here.
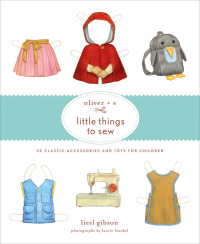
When I was in the STC Craft offices a few weeks ago, I managed to get my hands on a copy of Liesl Gibson’s new book, Oliver + S: Little Things to Sew. And it is gorgeous and completely inspiring.
Now, I don’t sew for kids. I hardly know any kids. But this book is so stylish that you could make some of the projects for your grown-up self and no one would be the wiser. Let’s take this tutu skirt.
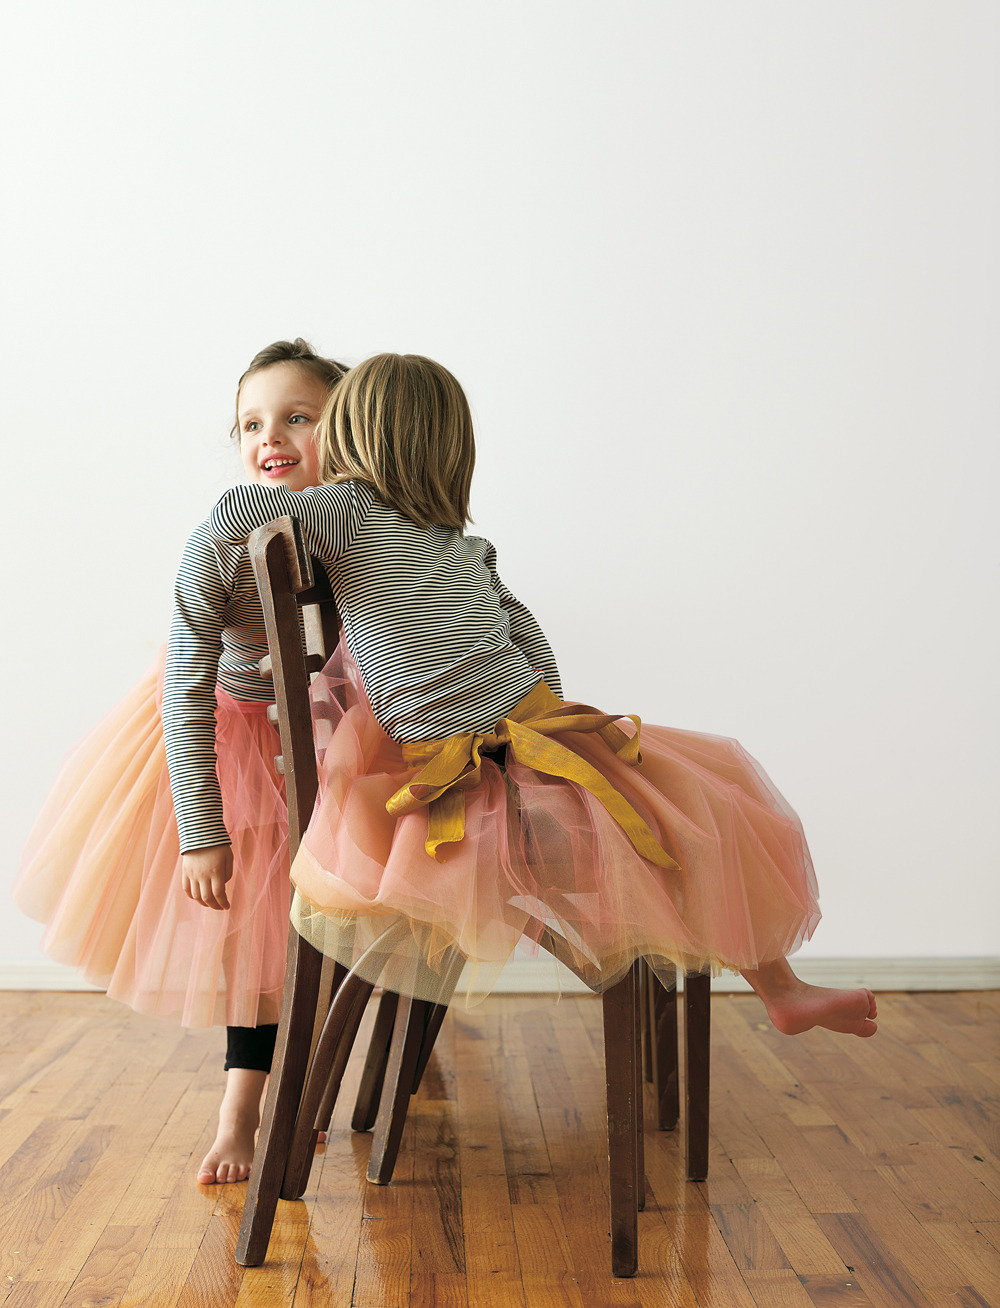
Sure, little girls will love it. But don’t you think the subtle loveliness of the multicolored layers of tulle would be much better appreciated by adults? And don’t you think it would be marvelous in just-below-knee length over a fabulous sheath dress?
Even better: the tutu skirt doesn’t require a pattern; you just cut the tulle to your desired waist measurement and skirt length.
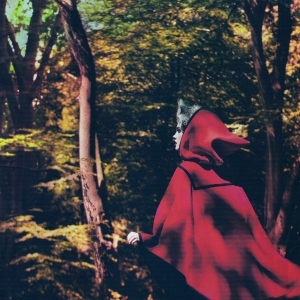
And how about this chic "red riding hood" cape?
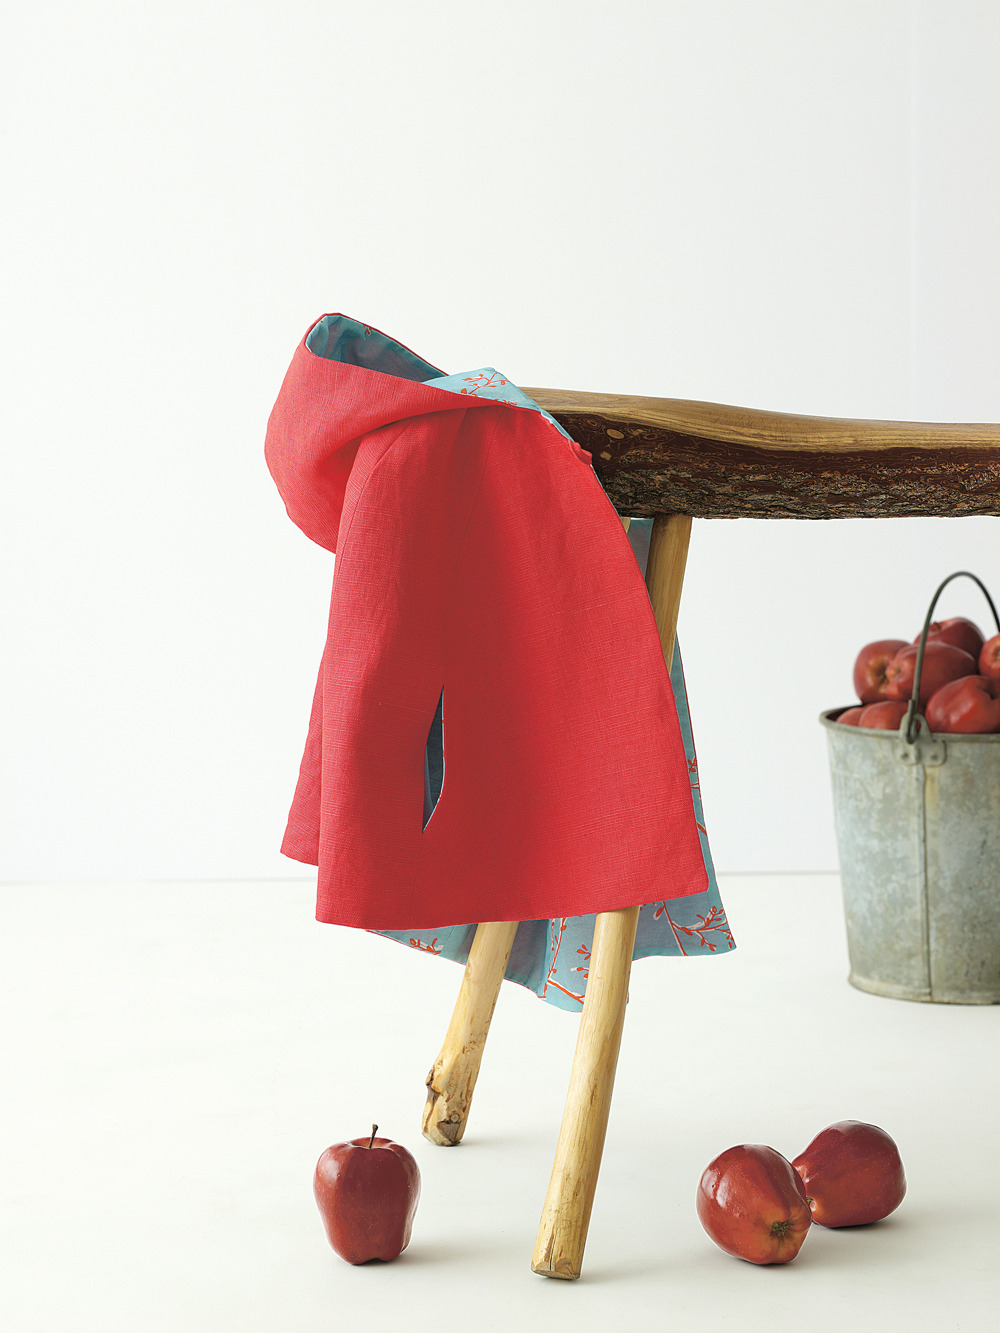
I can just see myself swanning about New York in something similar. I could just grade the pattern up a few sizes and it would be mine all mine! It even reminds me of the fabulous Red Riding Hood-inspired Vogue spread from a couple years ago.
I think lots of grown women have responded similarly to oliver + s patterns because they have a clean sophistication that’s rare in children’s wear. And the book totally, completely mirrors that aesthetic vision. The styling is just gorgeous, so simple yet completely striking. It was done by Diane Gatterdam, who has also done amazing work on store windows like Burberry and St. John.
So even if you live a child-free existence like me, do check out the book if you want some gorgeous visual inspiration--as well as your very own tutu!
P.S. You can see more beautiful photos from the book in this gallery.
Hello readers, I'm back! After a couple of months filled with travel to various craft and sewing shows, I'm home again and back to my weekly guest blogging here at STC Craft. Oh, and I'm also working diligently to finish up my own book, Gertie's New Book for Better Sewing. (Melanie is making sure of that!)
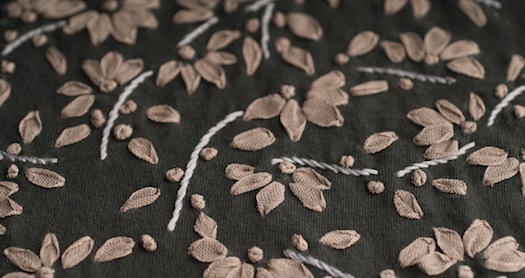
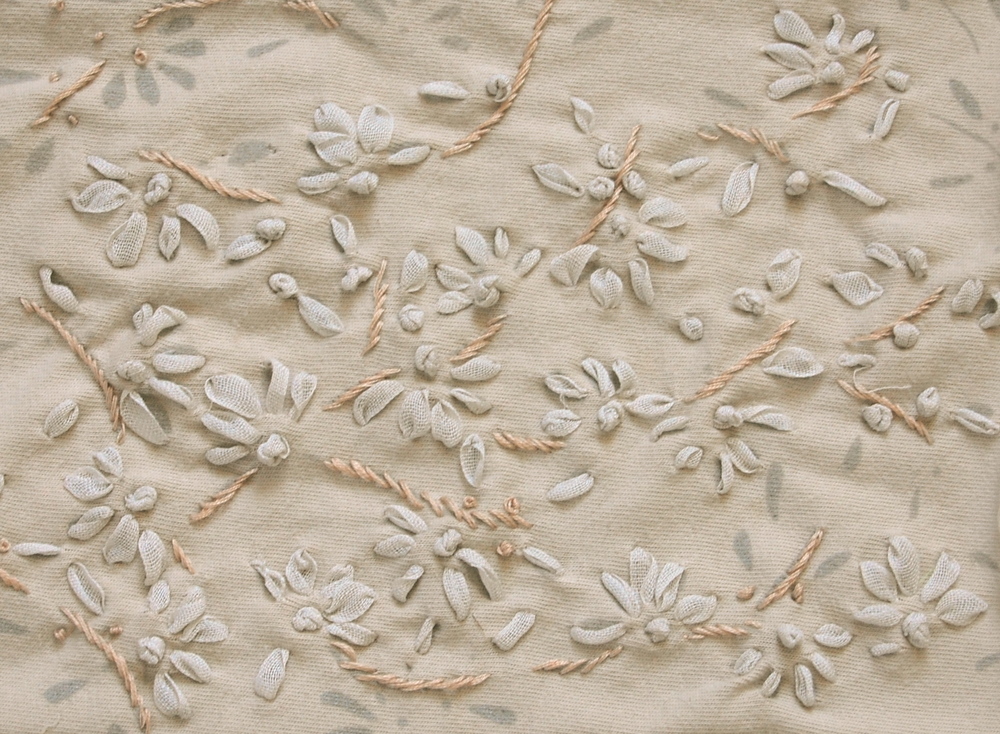
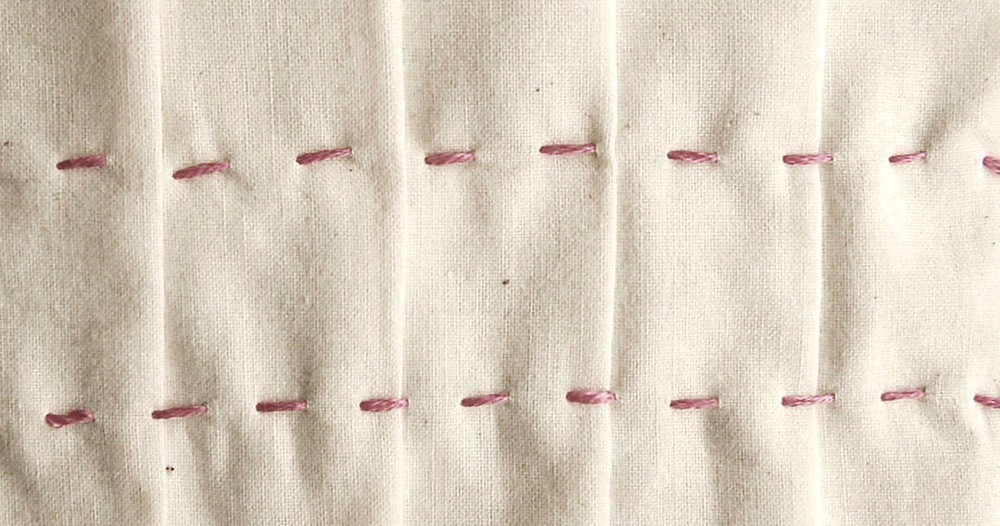
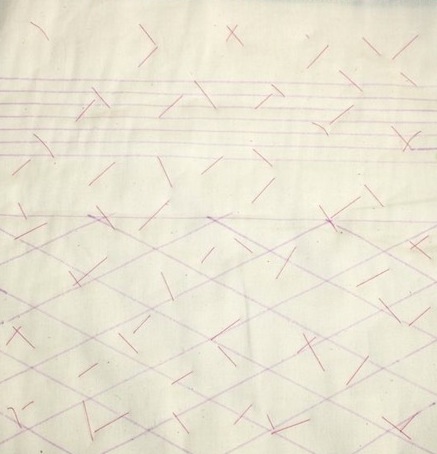
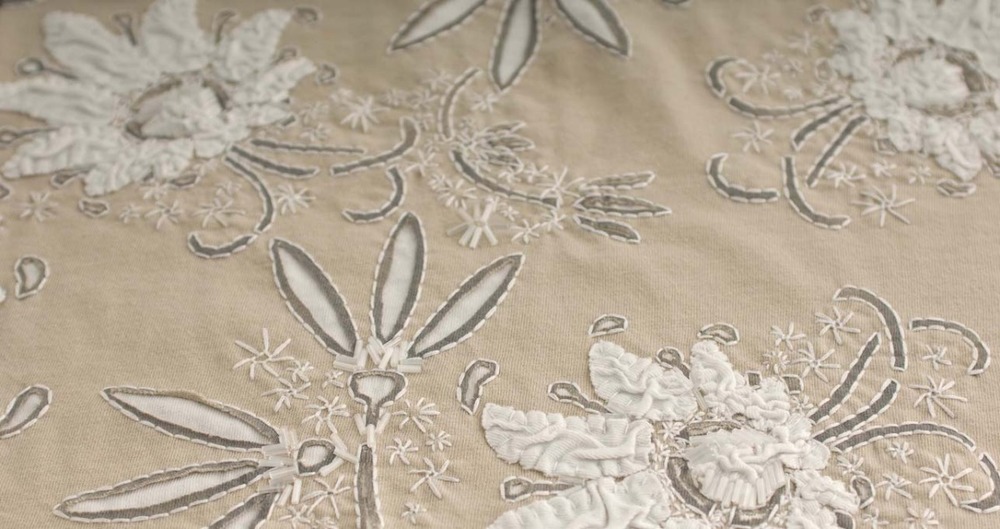
In my first post here, I wrote about proofreading the new Alabama Chanin book, Alabama Studio Sewing + Design. I fell in love with the ribbon embroidery in the book (see above), and just couldn't wait until the book released to try it out. Author Natalie Chanin was kind enough to send me a sample kit of a stenciled swatch, Japanese cotton ribbon, and some embroidery thread. It took me a little while to get the hang of embroidering with the tape-like ribbon, but once I did, I was addicted. (Tip: use a sharp needle with the biggest eye you can find; Chenille needles worked best for me.) I carried my sample around with me in a small plastic baggie, and would pull it out every chance I got. My subway rides have never gone so fast! There's something so soothing about doing such intricate handwork in the midst of New York City commuter chaos.
The pattern, called Climbing Daisy, is done with simple straight stitches and French knots in the cotton ribbon. The vines are stitched in regular embroidery floss in a stem stitch. You'll usually see ribbon embroidery done in silk ribbon, but Natalie's version is done in cotton, which adds to its simple charm, I think. The ribbon is a special Japanese trim; it's very rustic-looking with a gauzy weave. Don't worry if your local craft shop doesn't sell it; Natalie's company, Alabama Chanin, will be stocking it on their website by the time the book comes out in Spring 2012. If you're in New York, you can also find it at Mokuba, a fabulous Japanese trim store on west 38th Street.
Anyway, here's how my sample turned out. Not bad, huh?
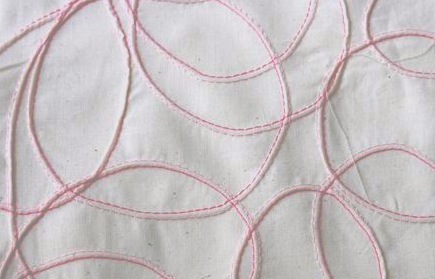
I was pretty devastated when I reached the end of my little square, and I had to call up Alabama Chanin right away to order a full-sized project. They indulged me by stenciling a dress kit with the Climbing Daisy pattern. I'm not really one for wearing lots of neutrals (understatement alert), so I chose a deep rose pink with ivory embroidery. The long pink stitches are for basting the two dress layers together.)

I've only started one panel, and couldn't help embellishing it further with clear sequins too. The whole dress will likely take me months. Actually, I'm counting on it taking a long time since I need my commuting fix!
What do you think? Are you looking forward to trying the ribbon embroidery in the new Alabama Chanin book? If it's not your speed, don't worry. There's a ton of other embellishment ideas, plus fabulous new garment patterns, including a totally glam long dress with a short train.
That's it for today, readers. I have lots more of my crafty adventures at STC to share with you--see you next week!

We wrapped up our Stitch Magic Stitch-Along last week and I'd say it was a rousing success. I now have several new skills under my belt to incorporate into my sewing projects, like smocking, pintucks, and cording. But the most inspiring thing for me was following Stitch Magic author Alison Reid's experimentations with fabric. I love her non-fussy, freeform techniques. I was lucky enough to do an interview with Alison and ask her some of my burning questions. I hope you enjoy it--and I very much hope you enjoyed the stitch-along!
What is your process like when developing your techniques? I imagine a lot of experimentation is involved.
I start by buying fabric, often it’s fabric that might be slightly unusual-looking. As I wrote in my book I live with it for a while and handle it. By doing this the fabric almost dictates what can be done with it. I never just launch myself in, I always have to appreciate the fabric first. Once I get going it’s just a matter of experimenting. Once I hit on an idea another one will follow. In other words, one thing informs the next.
How would you describe your philosophy when it comes to sewing and fabric manipulation?
I don’t actually have a philosophy. This creates boundaries and takes control. I have no rules; it’s all about how you feel and see things. It’s important to be creative and to be experimental. I am an art teacher as well as an author. One thing I always tell the children in my class is never be afraid to take risks. Be experimental, try new things, and never be afraid to make a mistakes. Mistakes do happen, but I find that often something great can happen out of a mistake.
What's your sewing background? Do you have traditional sewing training?
I attended art school in the 1980s and studied fashion and textiles. I specialized in woven textiles and my focus was weaving fabrics for interiors. The weaving process taught me a lot about patience and concentration. Dressing and setting up a loom could take days; you really had to be patient during that process. After finishing my own studies I taught for 20 years and it was during that time that I was sent to train in sewing at Manchester Metropolitan University.
Do you have any advice for readers looking to incorporate your techniques into garment sewing?
I love the idea of incorporating the techniques into garments. Garments are blank canvases for many of the techniques in the book. I have pattern-cutting and garment-making skills and I suppose if I was to give one piece of advice it would be to make a toile prior to using your chosen fabric. A lot of the techniques are folded, tucked, etc, so youreally need to work out how much fabric the technique needs.
What are you working on now? Can we look forward to more books from you?
Yes, I am working on some other things right now. I am not allowed to say what they are at the moment but, yes, you will see more books by me.
Thanks, Alison! And thanks to all the readers and stitchers who joined our stitch-along!
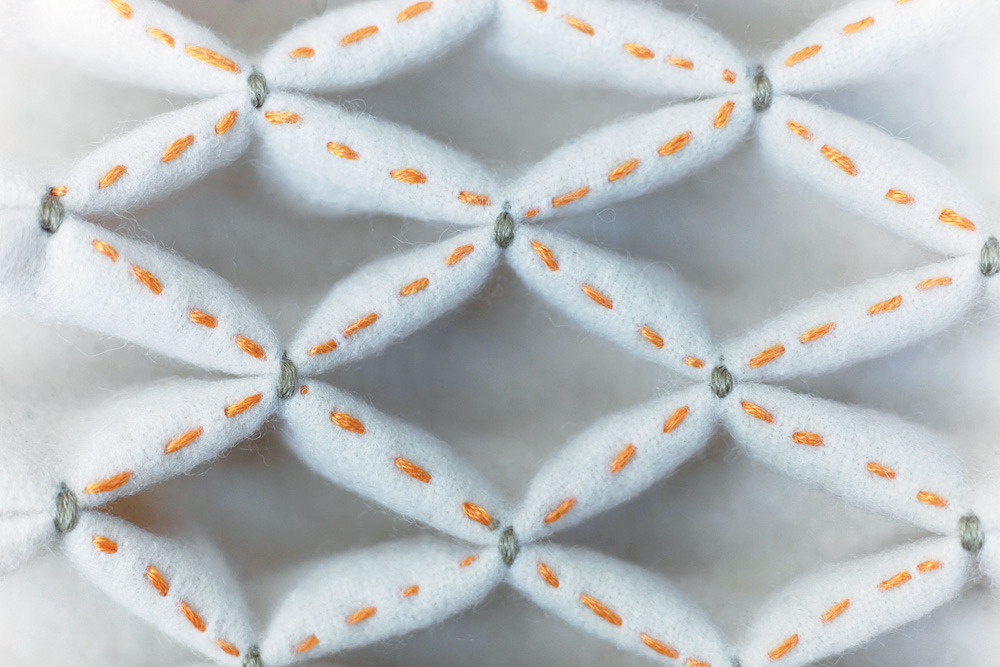
Hello and welcome to week 6 of our Stitch Magic Stitch-Along! This is our final installment, smocking. I saved this technique for last because it’s always seemed so mysterious to me. I’m happy to say that I now have a novice understanding of how this whole thing works. We’re going to do a honeycomb smocking technique to add to your group of samples. You can follow along on page 115 of Stitch Magic by Alison Reid. The above image of smocked and embroidered melton wool is taken from the book and you can see lots more pictures in the gallery.
Cut a long strip of fabric that is 10” tall by about 30” wide. Make a grid of dots on the wrong side, 1” apart from each other. I made 16 horizontal dots and 8 vertical dots.
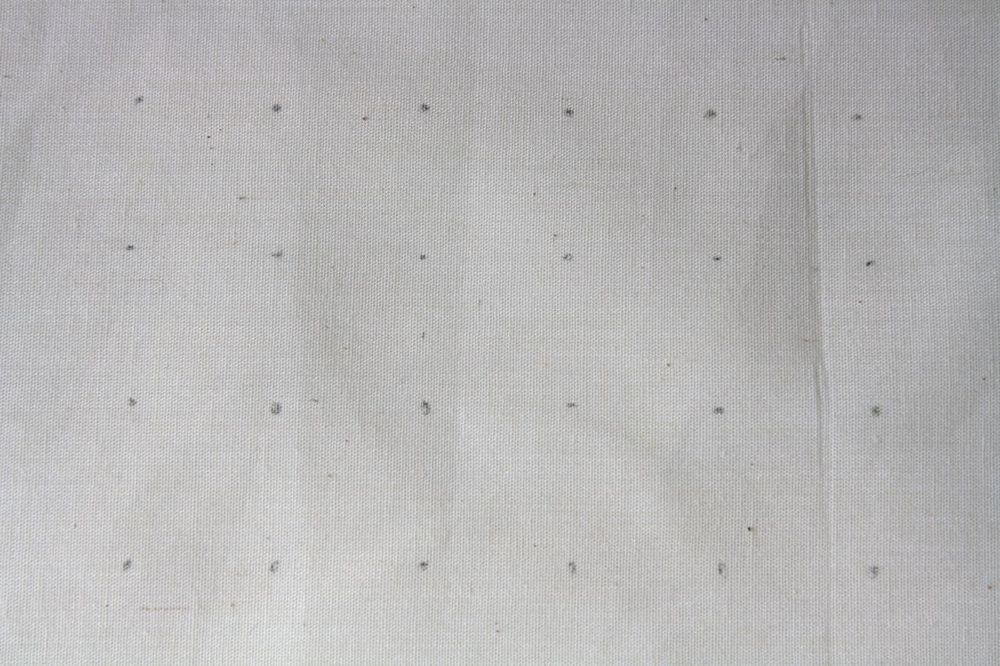
Thread a needle with a long strand of all-purpose thread and enter the fabric on the uppermost righthand dot. Using your dots as a guide, stitch a running stitch through your dot pattern, going in at one dot and up at the next.
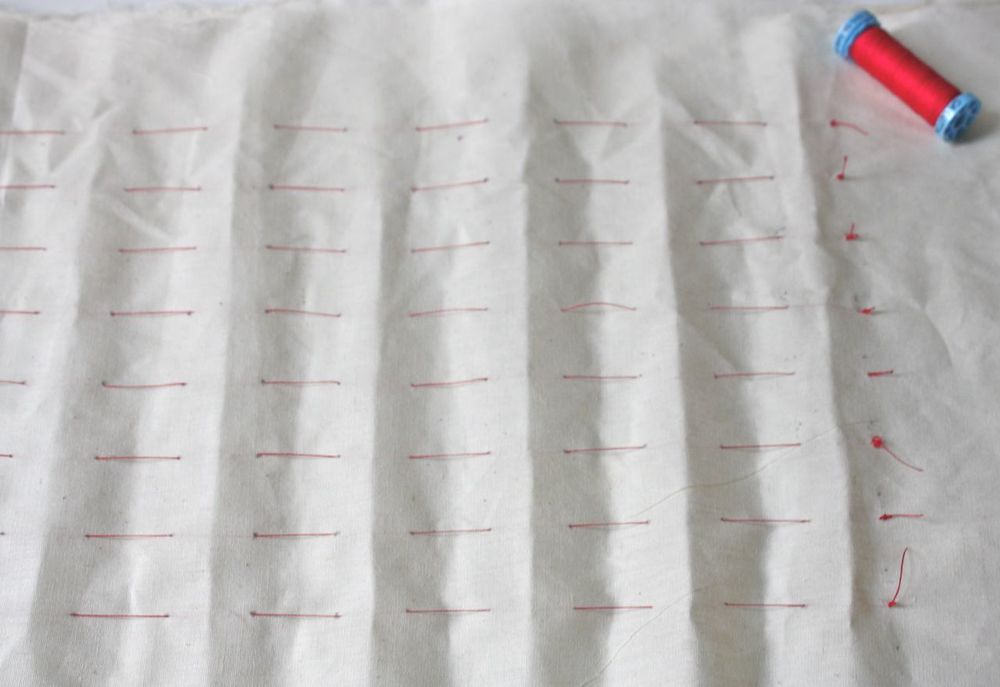
Pull the threads, two at a time, so that they form even folds.
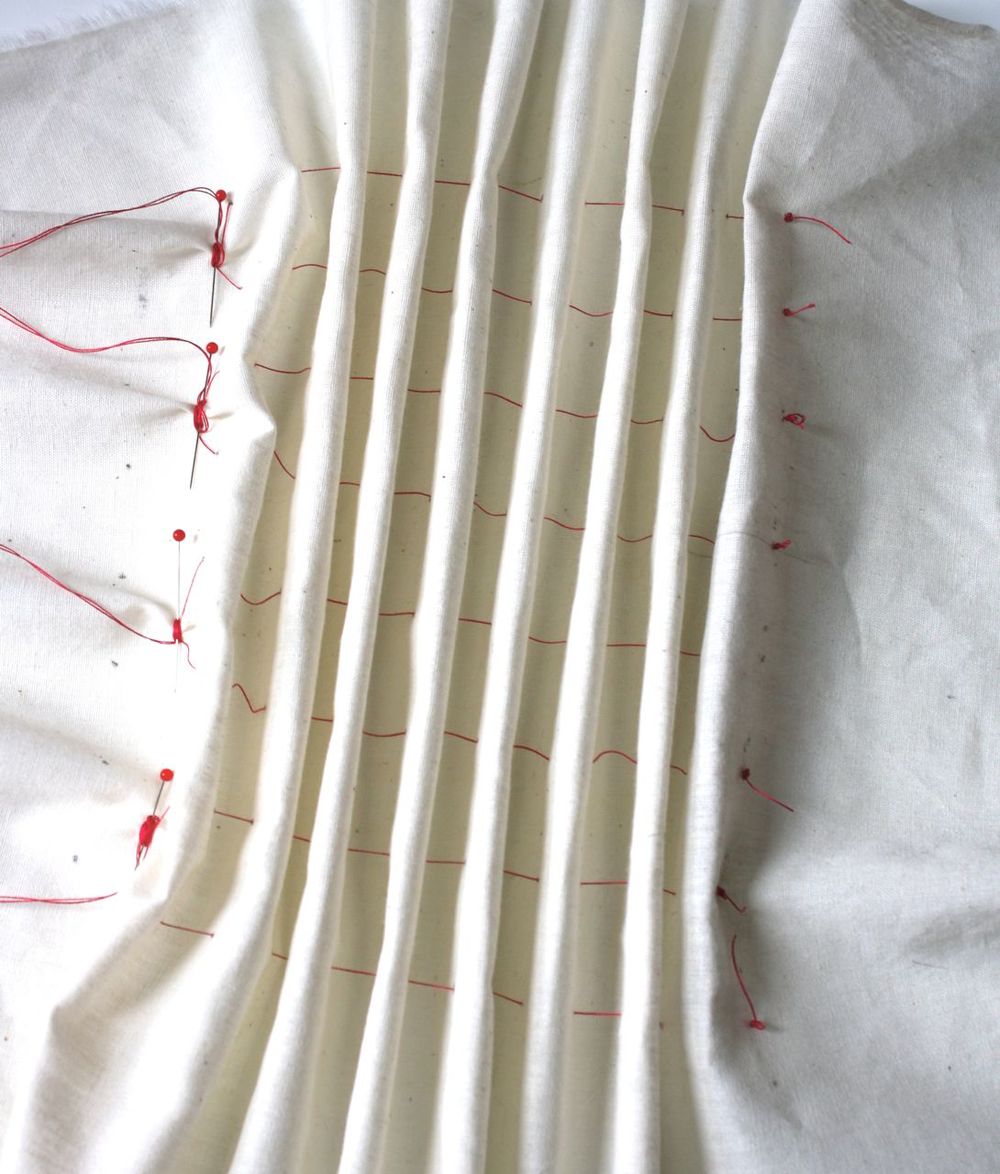
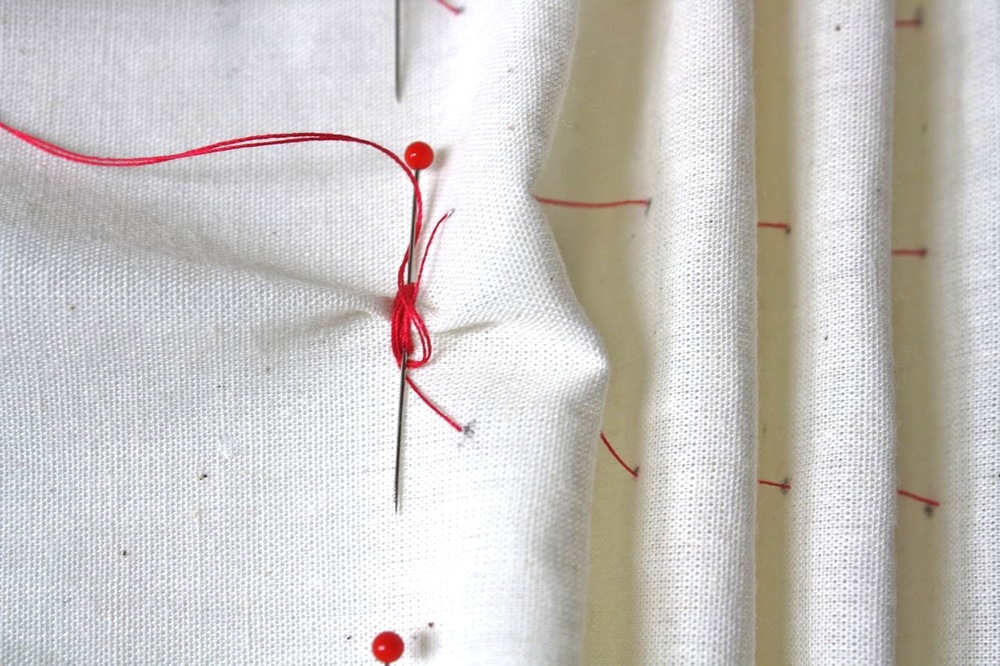
Secure the thread ends together by placing a pin in the fabric and looping the thread tails around it in a figure 8 pattern.
Now you’re ready to smock! Note: Do NOT do what I did and do your smocking on the wrong side of the fabric, where your dots are. Those are meant to be on the backside. Oops!
Thread a large-eyed needle with 6-strand embroidery floss. Start at the uppermost left fold and enter the fabric from the back. Stitch the two folds together using a couple backstitches. From the back of the fabric, proceed to the 2nd and 3rd folds, moving down a row diagonally. I loved Alison’s illustrations explaining this:

Continue in this way until you’ve smocked the whole grid. Here it is! Pencil marks and all, I still think it's pretty cool.
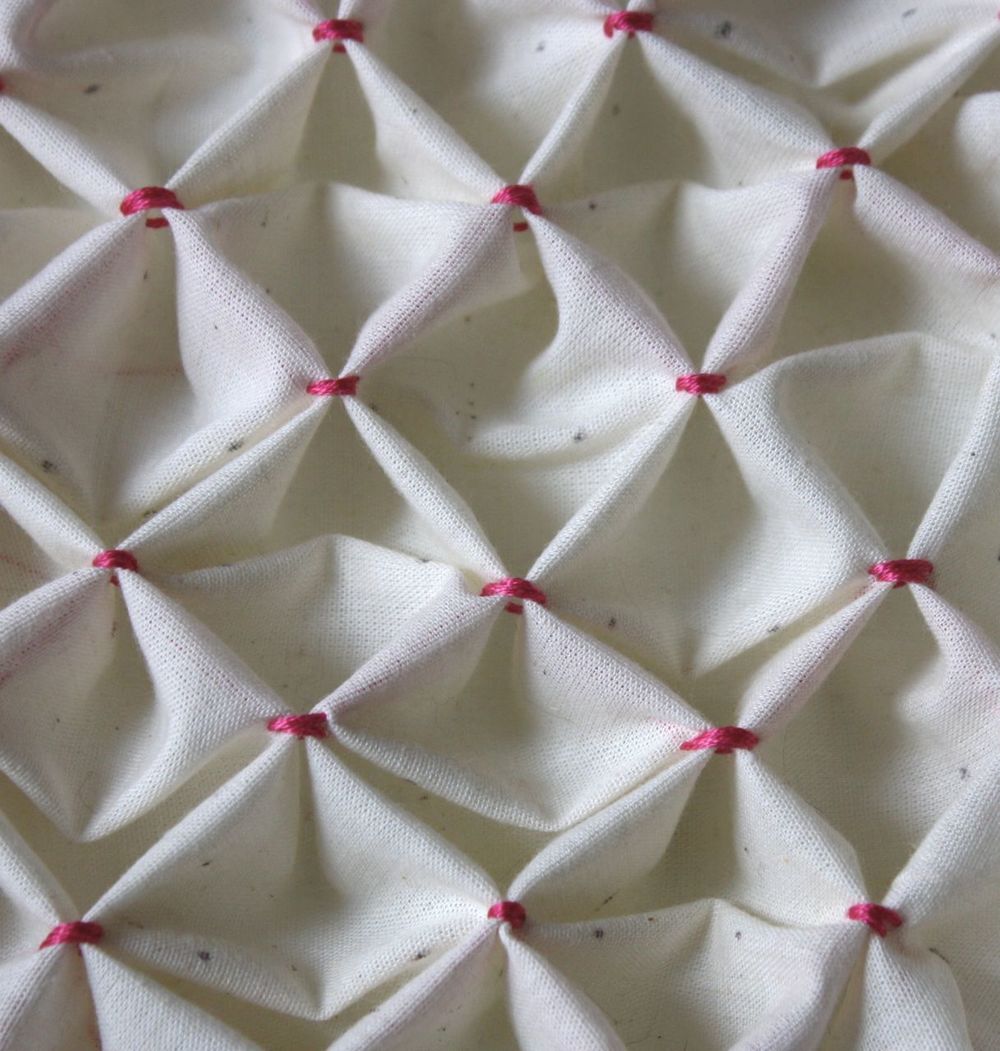
I love how stretchy and sculptural it is. I’m eager to try this on some garment projects, and Stitch Magic has a great apron with smocked pockets for inspiration.
Well, readers, that concludes our stitching portion of the Stitch-Along. But I have a treat for you! An interview with the author is coming soon, which will wrap up the whole series.

Two years ago, Amulet Books (part of Abrams Books, just like STC Craft is) released the fourth book in the Diary of a Wimpy Kid series--Dog Days. The Abrams marketing department went all out promoting the book, even organizing a cross-country ice cream truck tour. One day that summer, all Abrams employees walked into their offices to find a bright yellow Dog Days T-shirt on their desks. Just a little gift to get us excited about the book. And truly, I thought it was a very sweet gift. But deep down, I felt a little bit guilty because, well...I don't wear T-shirts. Pretty much ever. Let's just say that the boxy sleeves and straight waist of a standard tee don't do me any favors. So I took the shirt home and it sat in a drawer. I thought to myself, maybe I should hang onto the shirt and take it to Antiques Roadshow in 40 years when it will have become a true collector's item. But then, as summer 2011 rolled around, and I came up with an even better idea. Being a craft editor, I was, in fact, a little embarrassed that I hadn't thought of it earlier. I decided to cut up that boxy tee and turn it into a cute girly tank.

I first considered using the corset pattern from Alabama Stitch Book, but those tanks require cutting up an extra-large shirt and the Dog Days T-shirt was a trim ladies medium. Instead, I reached for a fabulous all-purpose T-shirt transformation book--Save This Shirt--which was, incidentally, the very first STC Craft book I ever helped edit.
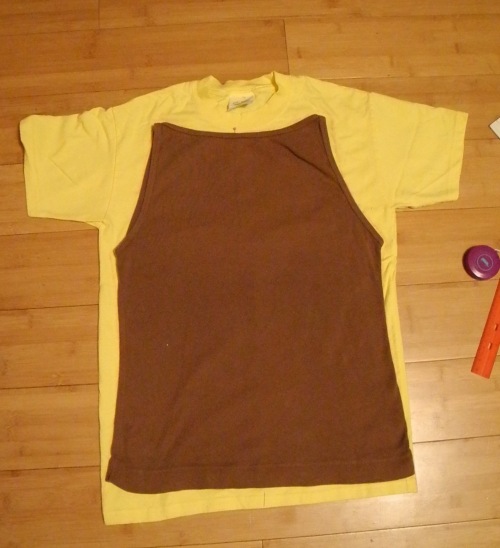
I settled on the design for Fit to Be Thai-d, a tank with a high front (so I could preserve the Dog Days logo), and an ornate laced up back. One of the first steps is to spread out your T-shirt, place a tank top that fits you really well on top of it, then trace around the edges. Once you've transferred the shape of your tank, you pin along the shoulders and sides and stitch along the tracing lines on a sewing machine.
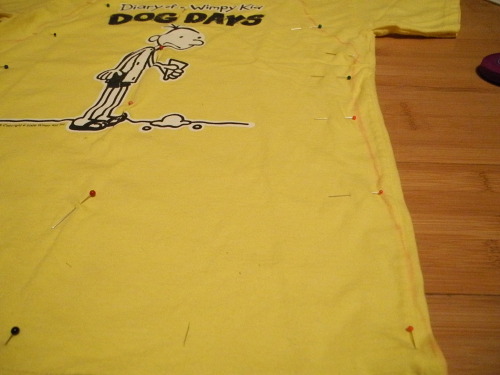
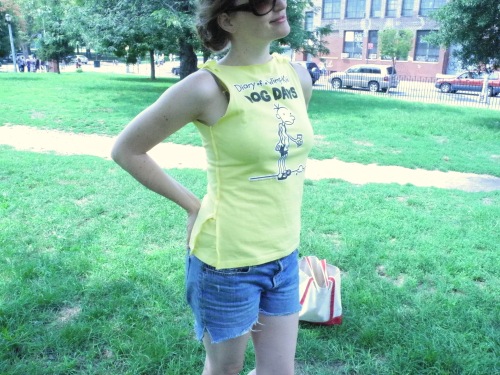
I realized about halfway into making the shirt that I wasn't going to have enough material on the sides (or the bottom for that matter) to do the fancy lace-up ties in the back. Yes, it's true, even craft book editors sometimes skim the instructions and make silly mistakes. But, never one to be discouraged, it was at that point that I strayed from the pattern and improvised! I trimmed away the excess material from the neck, shoulders, and sides, and tried on the tank to check the fit. The top looked nice, but I didn’t like the way it fit at the hips. I wanted it to flare out a bit more like a tunic. So I cut slits up the sides and then cut out two triangles of fabric from one of the sleeves. I sewed the triangles into the slits, and voila, instant flares. And now I have a lovely tank to wear during these last long dog days of summer...perfect for barbecues, picnics, water balloon fights, naps in hammocks, and of course, eating ice cream cones.
Welcome to week five of our Stitch Magic Stitch-Along! Today we’re talking about cording, which begins on page 85 of Stitch Magic by Alison Reid. Alison has tons of great ideas for unusual cording techniques. I have to say, today’s exercise was one of my favorites. I’ve been hard at work on my own book and doing this cording experiment was a great reminder of how fun and spontaneous sewing really is! It was just the break I needed.
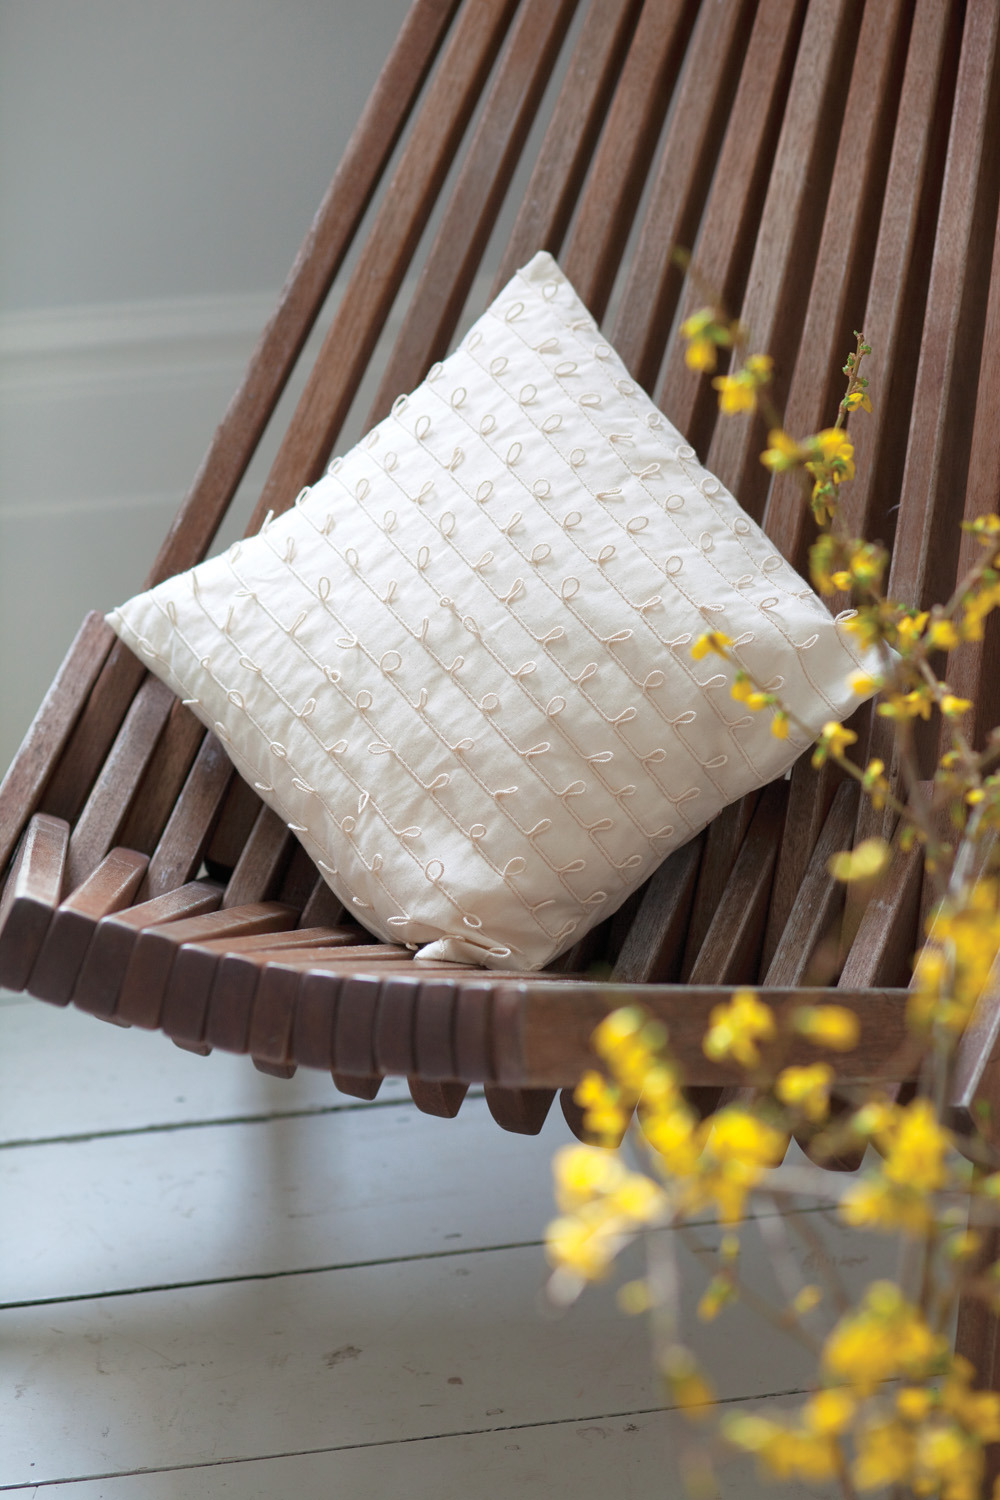
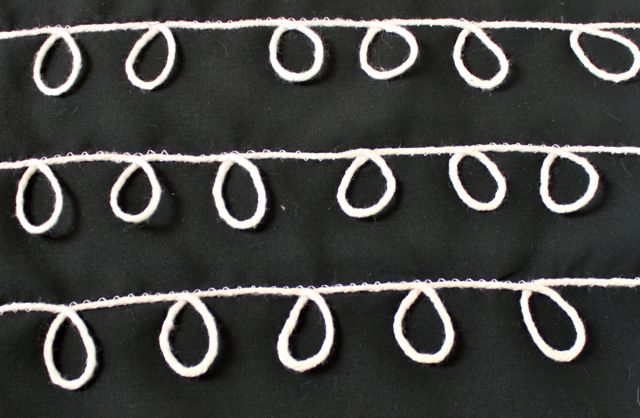
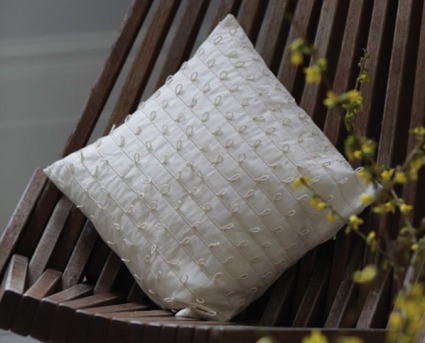
Let’s start with the technique that the author uses on the awesome pillow pictured above. I was especially drawn to this because I feel like it could be incorporated very easily and charmingly into apparel sewing. Wouldn’t these little loops look adorable around the border of a skirt?
I started by marking my lines on a 10” square piece of scrap fabric. I made lines 2” apart and drew little marks 1-1/2” apart on each line to mark where the loops would occur.
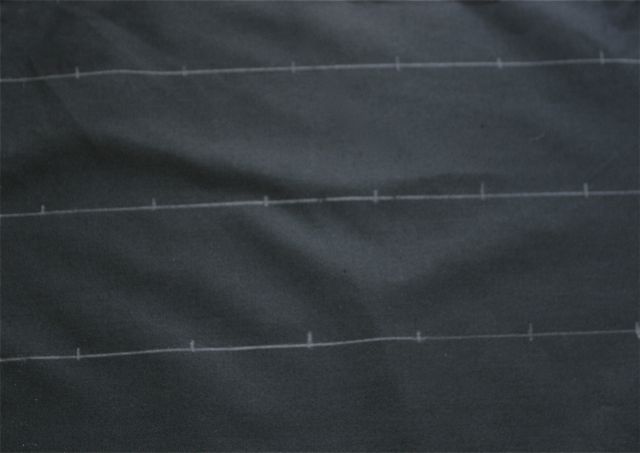
Now grab some cord (I used some natural-colored cotton cord that I had around the house). You can use a cording foot on your machine, but I wasn’t able to get one in time for this post. I started with my zigzag foot, but then found that my buttonhole foot was more effective since it has grooves on the bottom for the cording to pass through. (Mine is a traditional multi-step buttonhole foot, not one of the automatic buttonhole feet.) Zigzag over the cord and when you get to your little marks, stop with the needle down. Lift the presser foot and arrange the cord into a little loop with a twist at the top. Put your presser foot down and continue zigzagging. That’s it!
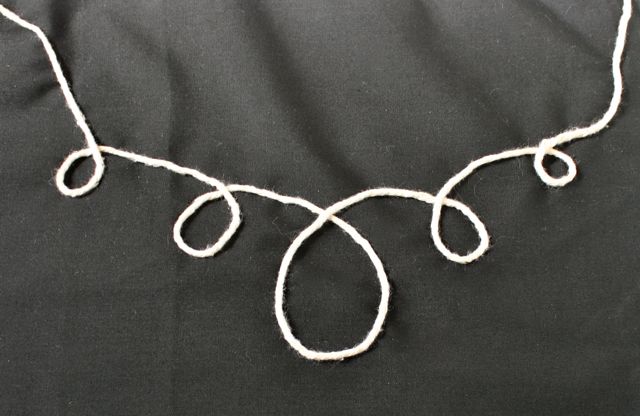
Here’s my practice version, which I did without marking lines and just improvising. Experiment with less regimented lines and loops!

Next I wanted to try something that was a little more intricate, inspired by this corded blouse tutorial. Get a new piece of fabric and arrange your cord however you please. You can make loops, bows, lines—whatever you want! Pin your design in place. Now stitch it down by hand, using a slip stitch. This means that you’ll take one little stitch out of the base fabric, followed immediately by one little stitch out of the cord. Your stitches should be on the underside of the cord to make them invisible. Match your thread to your base fabric to help it blend in.
Ta-da! Wouldn’t this be pretty on the neckline of a blouse?
I'm dying to try this with some premade satin cord, which is also called rattail cord. Ooh, I wonder if it comes in metallics?!
That wraps up this week’s stitch-along fun. Next week is our last week—smocking!
P.S. To see lots of images from Stitch Magic, cick here.

Welcome to week three of the Stitch Magic Stitch-Along! My apologies for the delayed post this week. I’m writing to you from lovely Cleveland, where I’m filming an episode of a PBS sewing show.
Today we’re talking about pleating, which begins on page 41 of Stitch Magic by Alison Reid. But first, a note: the author uses the terms pleats and tucks to apply to her own techniques, which are gorgeous (like the beautiful throw pillows pictured above). In the sewing community, there have been downright impassioned discussions about the difference in terms. For this sew-along, don’t worry too much about what the “proper” terminology is, but rather focus on how the author utilizes the techniques in her own designs—and how you can customize them for yourself!
Okay, let's dive in. Pleating requires very precise marking and folding, so I’ve only gone over two design samples this week. There are several more techniques in the book to try; I especially like the origami box pleats, shown below.

We’re going to start out with knife pleats, which are flat pleats that are generally uniform in size. Each pleat takes up three times its width. So, for a one-inch pleat, you need to allow yourself three inches of fabric. Make sense?
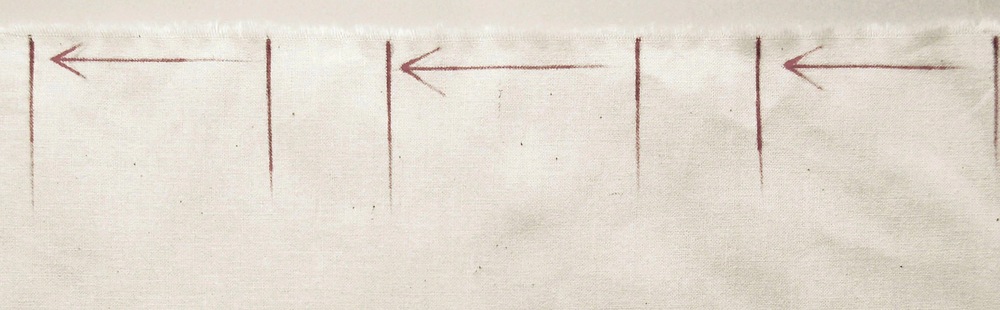
Start by marking your pleat lines. Mark two-inch pleat sections one inch away form each other. Mark them on the bottom of the fabric as well. Bring one pleat line to the other and pin in place.
To retain the soft, sculptural feel of the pleats, we’re not going to press our sample. (If you want crisper pleats, go ahead and press them.) Now take some six-strand embroidery thread and stitch the pleats down in incremental lines with running stitches.
It’s hard to get a straight line, so mark your fabric with disappearing ink or some sort of tape that doesn’t leave a residue. Masking tape has worked well for me; you might also want to look for Tiger Tape, a quilting notion that has incremental stitch marks along a tape that doesn’t leave any gunk on your fabric. Genius!
Now let’s try another technique. This is a sort of grid, with small projecting pleats in both the horizontal and vertical directions.
Make ¼” pleat marks on your fabric. The pleat marks should be 1-1/4” away from each other.

Fold and pin the vertical pleats. Now, stitch along the side of the pleat that isn’t folded. Next, do the same with the horizontal pleats. But! When you stitch the sections that intersect, pull back the little flap to form a sculptural detail. Your presser foot will want to do this naturally anyway, so you’ll only need to help it along a bit.

My sample got a little crooked at points (See? Marking well is so important!) but I still like how it looks. In fact, it reminds me of the bodice of a designer dress I saw recently. Zac Posen, anyone?
I hope you’ve enjoyed a look at Stitch Magic’s pleating techniques! Next week we’ll be trying cording, which is completely new to me. If you can, get yourself a cording or braiding foot for your machine. This isn’t crucial though—methods with a regular presser foot as well as hand stitches will be shown.
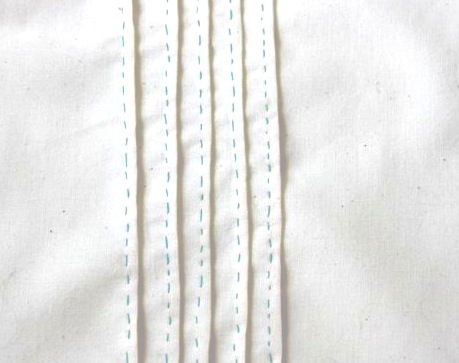
Welcome to week 2 of the Stitch Magic Stitch-Along! Today we’re talking pintucks, a beautiful design detail to add texture and interest to your sewing projects. This chapter begins on page 55 of Stitch Magic by Alison Reid. Do check it out, as there are tons of great ideas plus two beautiful projects—a table runner and a very cool tote bag.
First, let’s talk about the method that the author uses, which is a twin-needle pintuck with a special pintuck foot on your sewing machine. (Don’t worry if you don’t have these supplies, I’ll give you hand and machine alternatives later in this post.)
Pintucking with a Twin Needle and a Pintuck Presser Foot
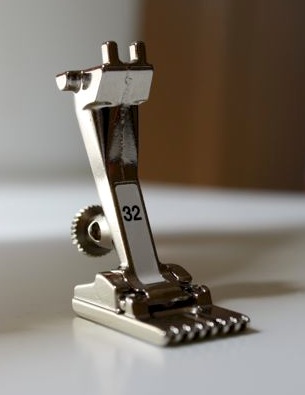
Install the foot and needle in your machine, and thread two spools of all-purpose thread in your upper thread mechanism. (Yes, I just wrote the word thread three times in a sentence. It couldn’t be helped, I’m afraid!) It’s just like threading as normal, but with two strands, which then go into the two separate needles. You can use different colored threads if you like, which will give you a different color of stitching on each side of your tuck.

Grab some test fabric. I’m using 10” tall strips of muslin that I can cut down into 10” squares once I’m done experimenting. (The idea is that we’ll have a bunch of 10” samples at the end of the Stitch-Along. For this exercise, you need to cut the squares down to size after stitching, since the tucks make the fabric smaller. Make sense?)
Now, just sew as you normally would! Start by sewing down the lengthwise grain of the fabric in rows. A tuck forms in the groove of your foot as you sew. When you go on to the next tuck, your first tuck should go into a parallel groove on your foot to keep the tucks evenly spaced.
Try making groups of tucks.

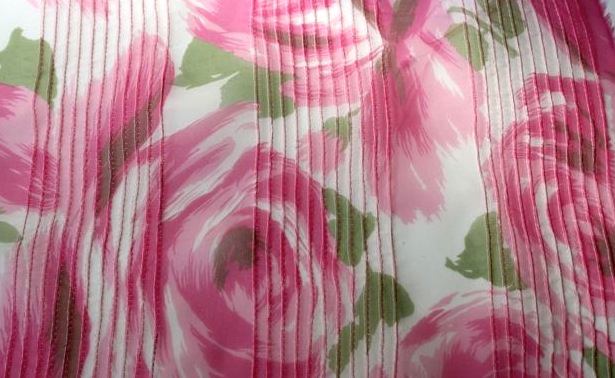
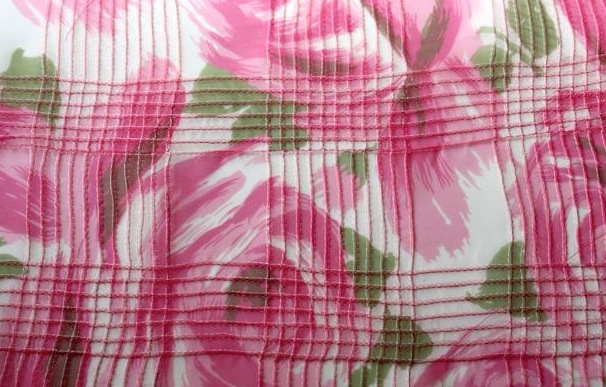
Experiment with printed fabric too. I’m using a beautiful floral silk organza here. Make perpendicular groups of tucks for a plaid effect. I love this look! I will definitely be doing this when I finally make this fabric into a dress.
Next, try some creative loops and curves. When you’re using a pintuck foot, you don’t have to tuck along a straight grain. Go crazy! This would be a fun effect for whimsical home décor, especially in a child’s room.
You can try all sorts of experiments with your pintuck foot: using stripes, prints, curved tucks, and different spacing options. Have fun!
Machine Tucks with a Single Needle
You don’t need a twin needle and pintuck foot to make pintucks. In fact, “authentic” pintucks (such as those used in historical costumes and heirloom sewing) are made by pressing the fabric in a fold and sewing along the fold with a single needle. This method is best used only on the straight grain of the fabric.
Start by marking your line with chalk or disappearing ink and then press the fabric on your line. Stitch 1/8” (or however far you choose) from the fold. Press the tuck to one side. That’s it!

Try groups of pintucks. To get evenly spaced tucks, mark all the lines on your fabric first, before you begin tucking. The distance between the lines should be the desired width between tucks plus two times the finished tuck width.
You can try bigger tucks too! (Though these aren’t technically pintucks anymore, just regular old tucks.) I had a dress from Anthropologie that had a series of big tucks placed horizontally around the hem. It was so cute! I tried out a 5/8” tuck on the bottom of my sample below.
Pintucks by Hand
You can also recreate this effect by stitching along the fold by hand rather than machine. Use the technique above, but substitute a running stitch by hand for the machine stitching. Use tiny stitches and press to one side.
Aren't pintucks fun? I can't wait to incorporate them into some garments. To do this, you'll likely want to pintuck your fabric first, and then cut out your garment pieces.
I hope you’ve enjoyed this installment of the Stitch-Along. How are your samples going?
Over the years I have worked at STC Craft, many photos for many of our books have been photographed at Melanie’s house. (When I’ve seen these photos after the shoot is finished, I’ve actually found myself thinking “and now it’s really a Melanie Falick Book.”) From Sewing Green to Knitalong to Weekend Sewing, Melanie’s home makes numerous appearances. And if you look closely, in almost all of these books, you’ll even see the infamous grass-green cabinet. (It’s shown above on the lefthand side, though the cover of Sewing Green is where the cabinet makes its most prominent appearance.)
And so, as we set out last week to do a final day of shooting for Heather Ross’s upcoming book, Heather Ross Prints (due in stores in fall 2012), we decided to keep things easy and head up to Melanie’s house in Beacon.
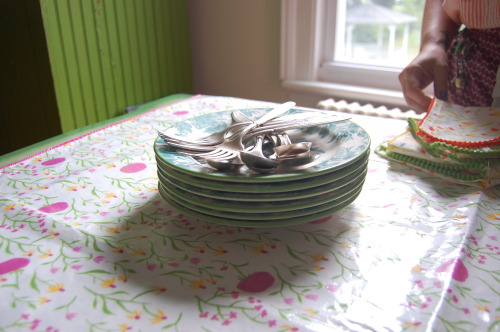
One thing that is great about shooting at Melanie’s house is that she has loads of antiques and interesting home wares, many of which we integrated into the shots. For instance, the Anthropologie dishes in the photo above are shown along with her grandmother’s silver--together they make a fabulous not-too-matchy match with Heather’s tablecloth and napkin projects.
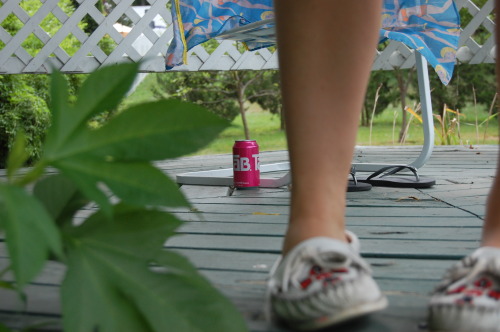
But of course, if you know Melanie at all, you know that she is a Tab soda fanatic. And so, along with the antiques, we had to give Tab a cameo in a detail shot of the sarong project (the sarong is on the chair, just out of frame). I snapped this low shot while the real shot that will be in the book was being set up.

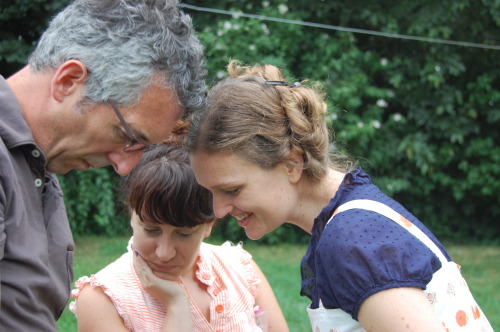
While every person at a photo shoot plays a key role, from the photographer (of course) to the person who goes to pick up the food for lunch (a VERY important job), our stylist, Karen Schaupeter, was a huge player. From keeping us on schedule to beautifully matching Heather’s prints within a setting, Karen moved quickly and kept things fun. In the photo above, she’s actually texting while ironing—talk about a multi-tasker!

As the stylist, Karen is in charge of bringing every possible prop we might need that day and organizing it so it will be at the ready. Shown above is just a small portion of the props spread out amongst the projects.
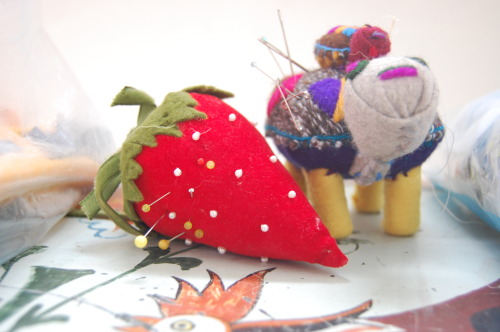
And here are two adorable pincushions that Heather provided as possible props. They may not have made it into the book, but they did make it onto the blog.

Shooting in a house can give you a world of options, but it can also have its limitations. For this shower curtain shot, Karen, the stylist, and John Gruen, the photographer, had their work cut out for them. Not only is the bathroom so small that you can’t possibly shoot a shower curtain from inside of it, but there wasn’t even a shower rod (only a tub). With some lighting poles and studio magic, we were able to fabricate a curtain rod and get just the right angle out in the hallway, producing what turned out to be one of our favorite shots. In fact, we liked the light in the bathroom so much that we wound up moving a table in there and shooting some still lifes on it.
And of course, on a photo shoot there are three things that you’ll see people doing a lot: checking their phones, snacking, and huddling over the camera to see how the shots are turning out. In this photo, Karen, John, and I gather around the camera to flip through the apron shots. And that’s right, I’m the one wearing the apron. (Again, when you shoot at Melanie’s house, you use the props on hand—including people.)

But the best part of shooting at Melanie’s house, aside from the great hospitality and the unlimited Tab, has to be her loyal companion, Molly—one of the sweetest dogs I’ve ever met. I love how you can barely see her tail in this photo because it’s wagging so happily. Aside from a bit of dog hair that needed to be lint-rolled off of the projects now and then, there’s nothing like a sweet pup to make a day of shooting that much more fun.

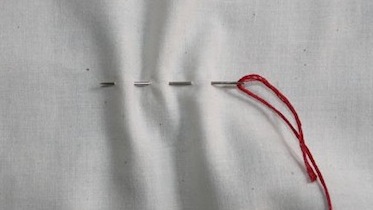
Welcome to the first week of the Stitch Magic Stitch-Along! This week's theme is quilting, which begins on page 70 of the book Stitch Magic by Alison Reid. The book shows you several examples of hand and machine quilting and incorporates them into inspiring projects like a beautiful chair cushion and adorable egg cozies.
Here, I've taken the author's methods and practiced some of them exactly as written (like diamond quilting and tuft quilting with scraps), and also devised a few of my own exercises, like channel stitching and zigzag quilting, two techniques often used in clothing. If you’re a garment sewer like me, it’s tempting to write quilting off and never learn to do it! But quilted effects are not only great for home décor, they’re a staple of modern designer garments and vintage pieces alike. (See my quilted garment inspiration post for lots of ideas on how to incorporate quilting into fashion sewing.)
Now, on to the techniques! First you’ll need to prep your fabric squares. (If you'd like to read up on the prep process, Stitch Magic goes into a lot of detail on pages 74-75). Start by cutting eight 10” squares of muslin or other cotton fabric. Pink the edges so they don’t fray.
Now cut four 10” squares of your thin cotton batting. Sandwich the batting squares between two pieces of your cotton fabric and pin to secure. Now we’re going to hand baste the layers together so they don’t shift when we quilt them. Thread a needle with a single strand of all-purpose sewing thread. Start by making big diagonal running stitches from one upper corner to a lower corner. Repeat these lines of stitches in regular intervals. Now, do the same thing in the other direction. I used a different color thread so you can see my second direction of basting. As you can see, neatness doesn’t really count here! These are temporary stitches.

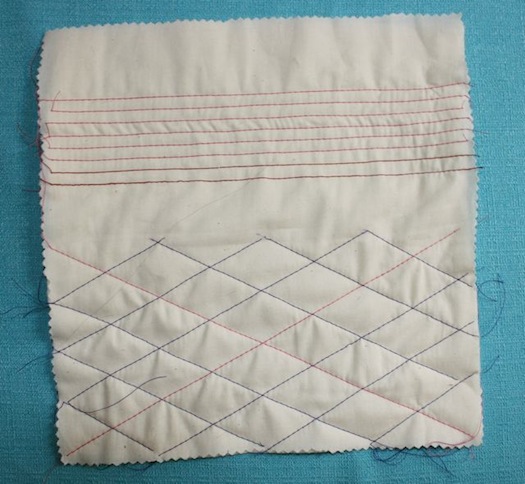
Now we’re ready to quilt! We’re going to start with some simple channel-stitching and diagonal quilting by hand. Prepare your square by marking it with a disappearing ink pen or some other removeable chalk. On the upper half of the square, draw about 7 parallel lines ¼” away from each other. On the bottom half of the square, make a 1” grid of diagonal lines.
Now we’re ready to try some channel stitching. This just means simple rows of stitching ¼” away from each other. (I’ve been in love with channel stitching ever since I saw it on a beautiful Diane Von Furstenberg dress a couple years ago. It was a glorious bright red wool jersey with a full circle skirt and a wide midriff band with channel stitching.) Load a large-eye needle with some embroidery thread and make a running straight stitch across your lines. Here's what the running stitch looks like in process.
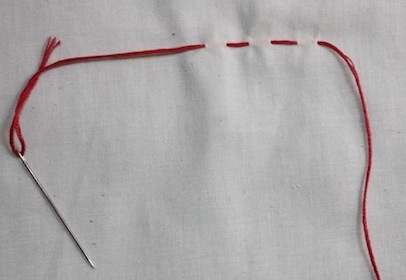
Now make the running stitch along your marked lines. Try to make your stitches as even as possible. Experiment with different effects by using fewer strands of embroidery floss. I started with 6 and then split the thread down to 3, 2, and 1 strands as I went up my lines. It gave a cool pseudo-ombre effect.

You can mark the back of your sample with the thread used (or any other notes) to remind yourself! 
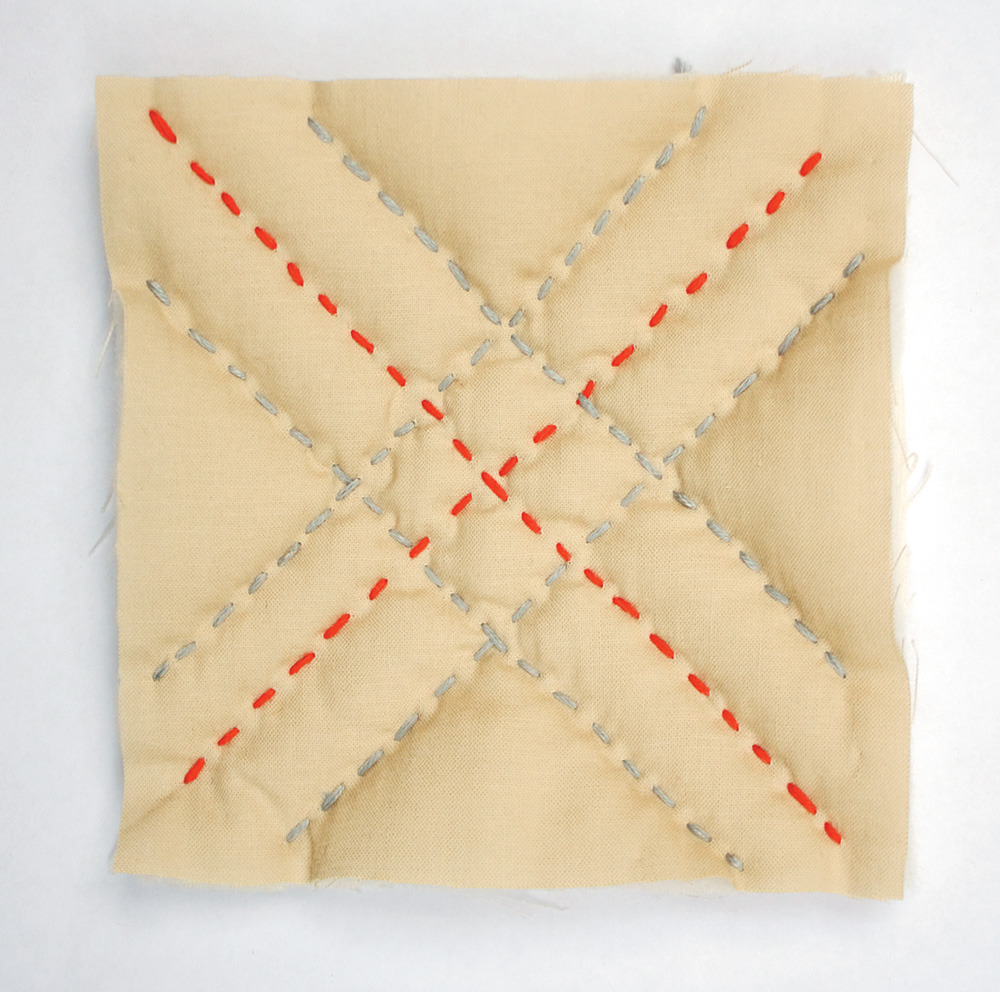
Now for the diagonal quilting. Again, we’re just using a simple running stitch, but this time we’re quilting along our diagonal lines. I used 6 strands of embroidery floss for all of my lines here, but played around with two different colors to achieve an argyle effect. 
Isn’t your sample pretty?

Next, you can try the exact same exercise with machine quilting. I used regular all-purpose thread in my machine and used a 3.5mm straight stitch and a straight stitch presser foot. Make sure that you smooth out the square as you quilt to avoid puckers.
Now you can play around with different patterns if you like. I was eager to try some zigzag quilting. I drew one big zigzag on the upper half of a new square. Then I quilted the line by machine (you can do it by hand if you prefer). Next, I used the edge of my presser foot to make ¼” lines that echoed the first zigzag.

I found it a little difficult to get perfect lines using my presser foot edge, so next I did a ½” zigzag pattern, making each line with disappearing ink before quilting.
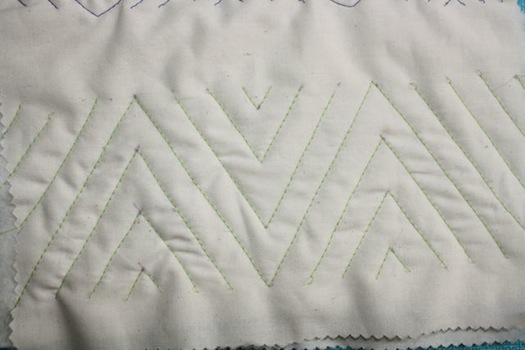
This is my favorite sample I think! I would love to make an entire circle skirt quilted in this pattern.
Last, you can try a fun effect that incorporates tiny fabric scraps and tufts made by tying off embroidery thread. Start by cutting small squares of two different fabrics, one a bit bigger than the other. I did my tiny squares in blue ultrasuede and my slightly bigger squares in a cotton print.
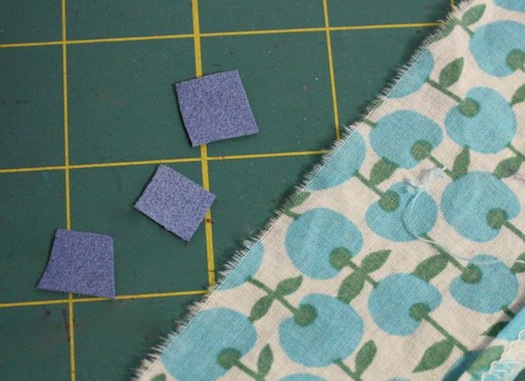
Layer the squares on top of each other and arrange them on your fabric square. Load a needle with embroidery thread and stitch down and back up through each square. Tie the embroidery thread in a knot and cut it off at about ¼” for cute little tufts.
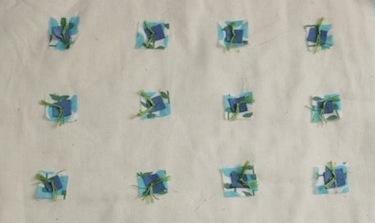
This would be really cute on a pillow, don't you think?
That’s it for this week, stitch-alongers. Next week we’ll be doing pintucks, which we’ll also do both by hand and machine. I’ll also discuss the pintuck presser foot and twin needles.
Happy stitching!
While I’ve been gearing up to do some ribbon embroidery from the new Alabama Chanin book, I’ve also been thinking of ways we can make my posts here more interactive. And what better way than a little sew-along? Or rather, a stitch-along! I’ve been reading the book Stitch Magic by Alison Reid and it has tons of fun ways to spruce up your sewing. I can’t stop thinking about adding pintucks, pleats, and cording to my projects. Being a lover of vintage fashion, I see these details all the time in gorgeous dresses but have never taken the time to properly learn the techniques.
So here’s what I propose: each week we will do a little stitch sample trying out one of the techniques. I’ll guide you through the how-to and give you inspirational ideas for adding these flourishes to your handmade garments. At the end of the stitch-along, you’ll have a little sample book of swatches to refer back to!
The standard supplies needed will be thread, hand-sewing needles, and some cotton fabric. If you have a sewing machine, that's great. If not, I'll give hand-stitching options for each technique. Here’s what I’m thinking for the schedule (with special supplies needed in parentheses):
Week of 7/ 25: Quilting (six-strand embroidery floss, batting)
Week of 8/1: Pintucks (twin machine needle, pintuck foot helpful but optional)
Week of 8/8: Pleating
Week of 8/15: Cording (cotton piping cord, cording foot optional)
Week of 8/22: Smocking
Are you in? What do you think? Personally, I think this is going to be great fun! Please leave any questions in the comments.
 Hello there! I’m Gretchen Hirsch, but I’m better known as just “Gertie” in the blogosphere. I write Gertie’s New Blog for Better Sewing, where modern seamstresses come learn and share sewing tips and tricks. We also discuss vintage and contemporary fashion, body image, and feminism, and recommend good cat videos on YouTube. (Who doesn’t love a good cat video?)
I’m thrilled to be here blogging for STC Craft. I’m lucky to call this my publishing home, and now it’s my freelance work home too! Melanie Falick took on my book project last year, and I’m looking forward to its release in fall 2012. And if that weren’t enough, she also gave me the courage to quit my day job by giving me editing work at STC Craft. Needless to say, I’m a big fan of hers.
Last week, I spent my first couple days in the office. My inaugural task was to do a “cold read” of Natalie Chanin’s new book, Alabama Studio Sewing + Design, which will be published in spring 2012. This meant lending a pair of fresh eyes to the proofs in their late stage, and bringing a seamstress’s perspective to the instructions and projects. As someone who has read and loved both of Natalie’s previous books, it’s kind of hard to believe that this is called “work.” If you haven’t read Alabama Stitch Book or Alabama Studio Style, it’s high time you did. They have something to inspire every type of seamstress—whether you love sparkly embellishments, deconstructed fashion, or the art of hand sewing.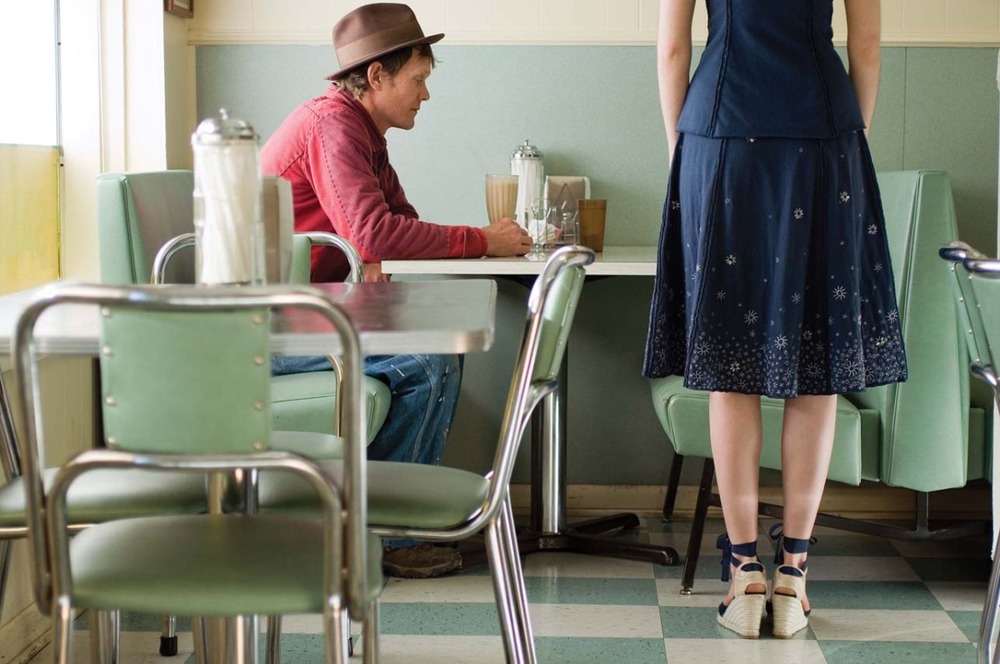

And Natalie’s new book is just as wonderful, filled with the beautiful garments and amazing embellishment techniques that her brand is known for. There are lots of patterns for garments and accessories, like a glamorous long dress with a small train and an adorable bucket hat. All the projects are gorgeous, but one of my favorites is her ribbon embroidery, done with cotton tape.

Which brings me to my next task here at STC Craft: blogging weekly about techniques from STC Craft books. I’ve decided that my first project just has to be the cotton tape embroidery from Alabama Studio Sewing + Design. So I’m going to be gathering up my supplies and getting ready to do some stitching. I can’t wait to share the results with you.
Until next time!
|
|
||
|
Dads are kind of hard to shop for, right? Ask a typical dad what he wants for Father's Day and he'll likely shrug his shoulders and--with a smile, of course--say "I don't know." I don't think that they mean to torture us with their ambiguity. For many dads, it's simply a matter of not really having much of a wish list. Except maybe love, a little respect, and for someone to laugh at their corny jokes (or at least make fun of them). But for those of us who want to give a gift beyond love, respect, and laughter, we have to get a little creative. Lucky for crafty types, we've got creativity in spades! For the knitters amongst us, look no further than Knits Men Want. As the subtitle states, it's all inclusive: "The 10 Rules Every Woman Should Know Before Knitting for a Man--Plus the Only 10 Patterns She'll Ever Need." A few photos from the book are shown below, including lots of quick-knits for Dad, and even a few dude-approved sweaters. And for another classic dad gift with a knitterly twist, try your hand at the Rusted Elegant Tie from Knitting Classic Style (shown above). Father's Day is June 19--just over a month away--so get out your needles and get crackin'! |
||
|
|
|
|
|
|
|
|
|
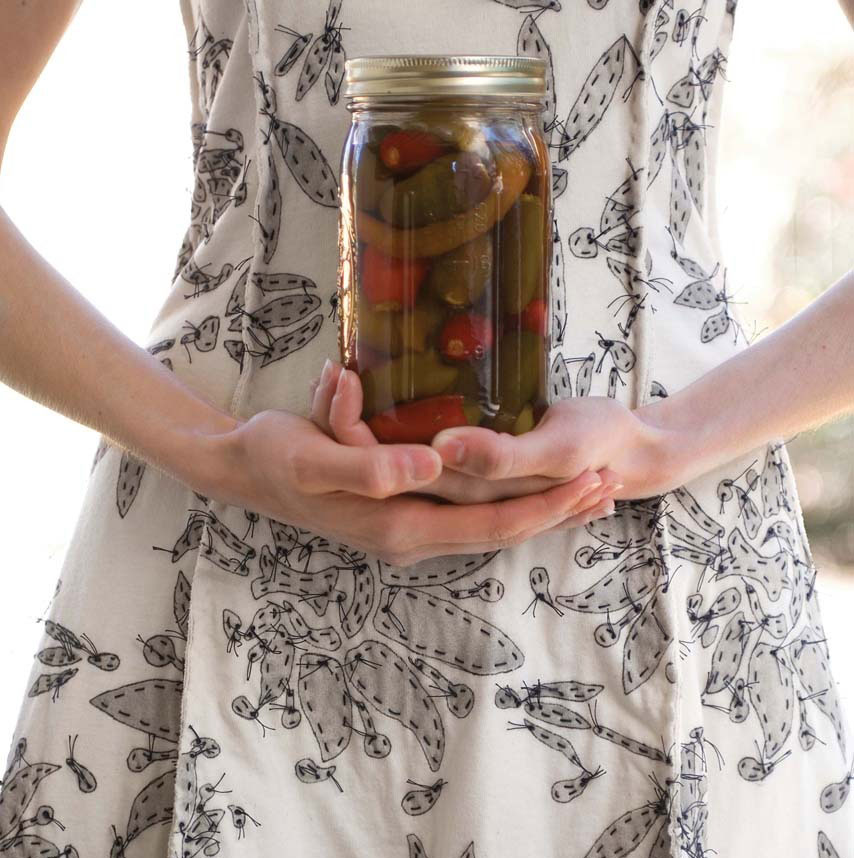
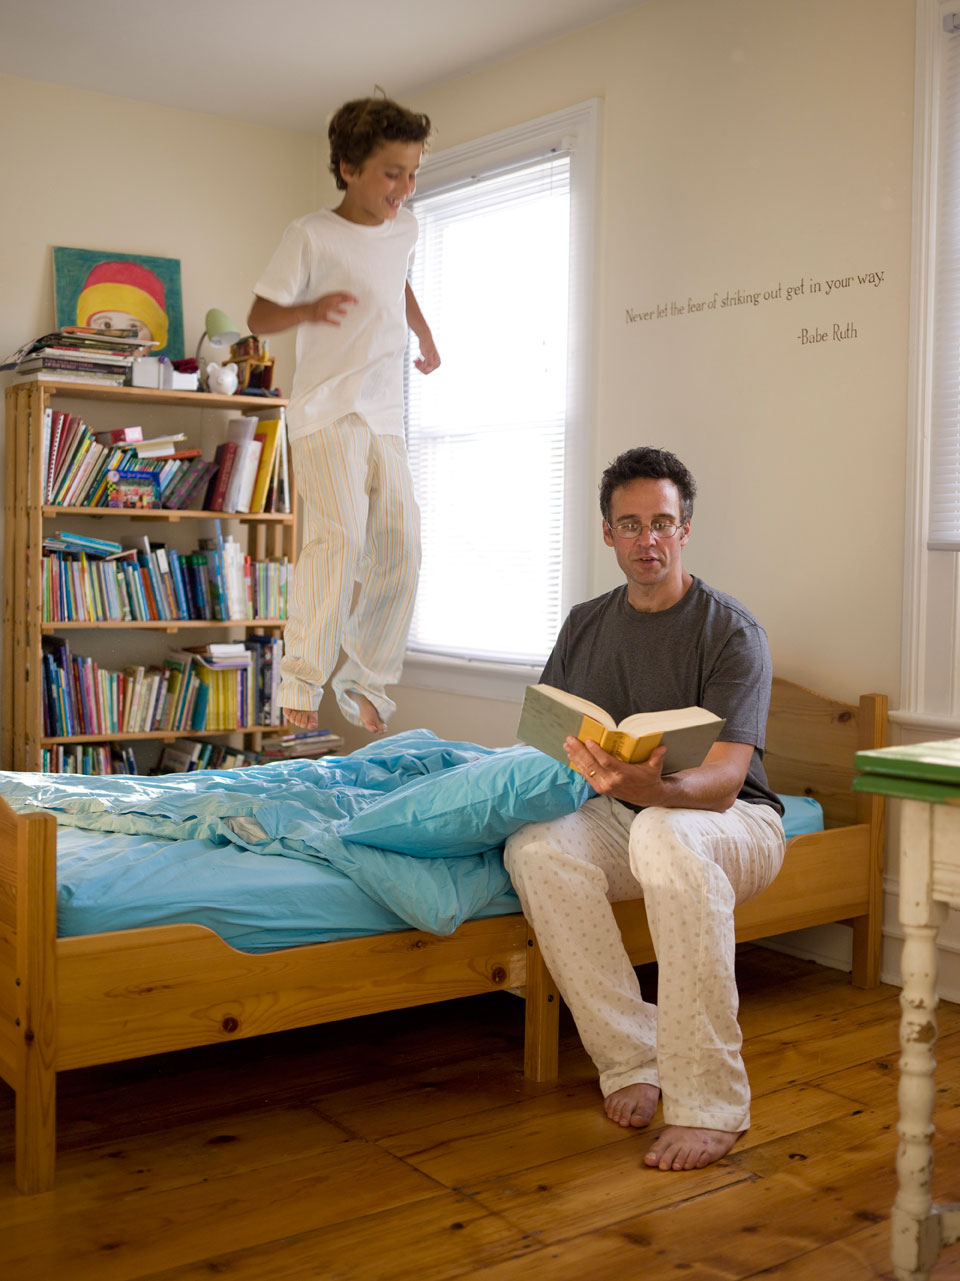
For the non-knitters amongst us--or for those who are pressed for time--we've got more great ideas for handmade dad gifts. Shown below, clockwise from top left: Gus's Dog Bed from Printing by Hand (A screen-printed fabric that is then sewn into a pillow--this is the perfect gift for Dad and his best buddy.) Pickles from Alabama Studio Style (Several recipes for making homemade pickles for Dad. Perfect for sandwiches or for a Bloody Mary brunch on Father's Day.) Hexagon Storage Bin from Modern Paper Crafts (A receptacle you can make yourself to hold anything from fishing rods to recycled papers.) Pajamas for Everyone from Weekend Sewing (An easy-to sew project for every member of the family. If the Dad in your life is a lounger, this is the perfect gift for him.) Story Time Clock from The Repurposed Library (A unique clock, perfect for Dad's den or office. Pick a book tailored to his interests (golf, baseball, computers, a volume of an outdated encyclopedia featuring the first letter of his initials, or maybe even an old cookbook for culinary types). Decoupaged Fridge from Crafting a Meaningful Home (A cool way for Dad to remember his favorite city. Or if he's more of a nature guy, use maps from a hiking trail. If Mom won't let you decoupage the fridge, consider decoupaging him a tackle box or a stepladder...or something else that can stay in the garage.) |
||
|
|
|
|
|
|
|
|
|
So, readers, we hope this post gets your creative juices flowing! Tell us which of these gifts your Dad would like the most in the Comments section and you'll autmatically be entered to win the STC Craft book of your choice (see the choices here). Enter by noon on June 1. Three winners will be picked at random and notified that day. For official sweepstakes rules, click here. |
||

This weekend, join STC Craft and Oliver + S Little Things to Sew author Liesl Gibson as we celebrate Liesl's new book with a special New York event.
On Sunday, April 10th, stop by the beloved children's bookstore Books of Wonder for an afternoon of craft-y fun. Liesl will be signing copies of Oliver + S Little Things to Sew, and guests can dress paper dolls in Oliver + S fabrics while enjoying tasty treats. All ages are welcome!
See below for the complete details and feel free to contact us with any questions. To see a gallery of images from the book, click here.
Hope to see you Sunday!
![]()
Oliver + S Little Things to Sew Launch Party
Sunday, April 10th, from 1 – 3 pm; free and open to the public
Books of Wonder
18 West 18th Street
New York, NY 10011
(212) 989-3270
[map]
Subway: F, M to 14th Street
4, 5, 6, L, N, Q, R, W to 14th Street – Union Square

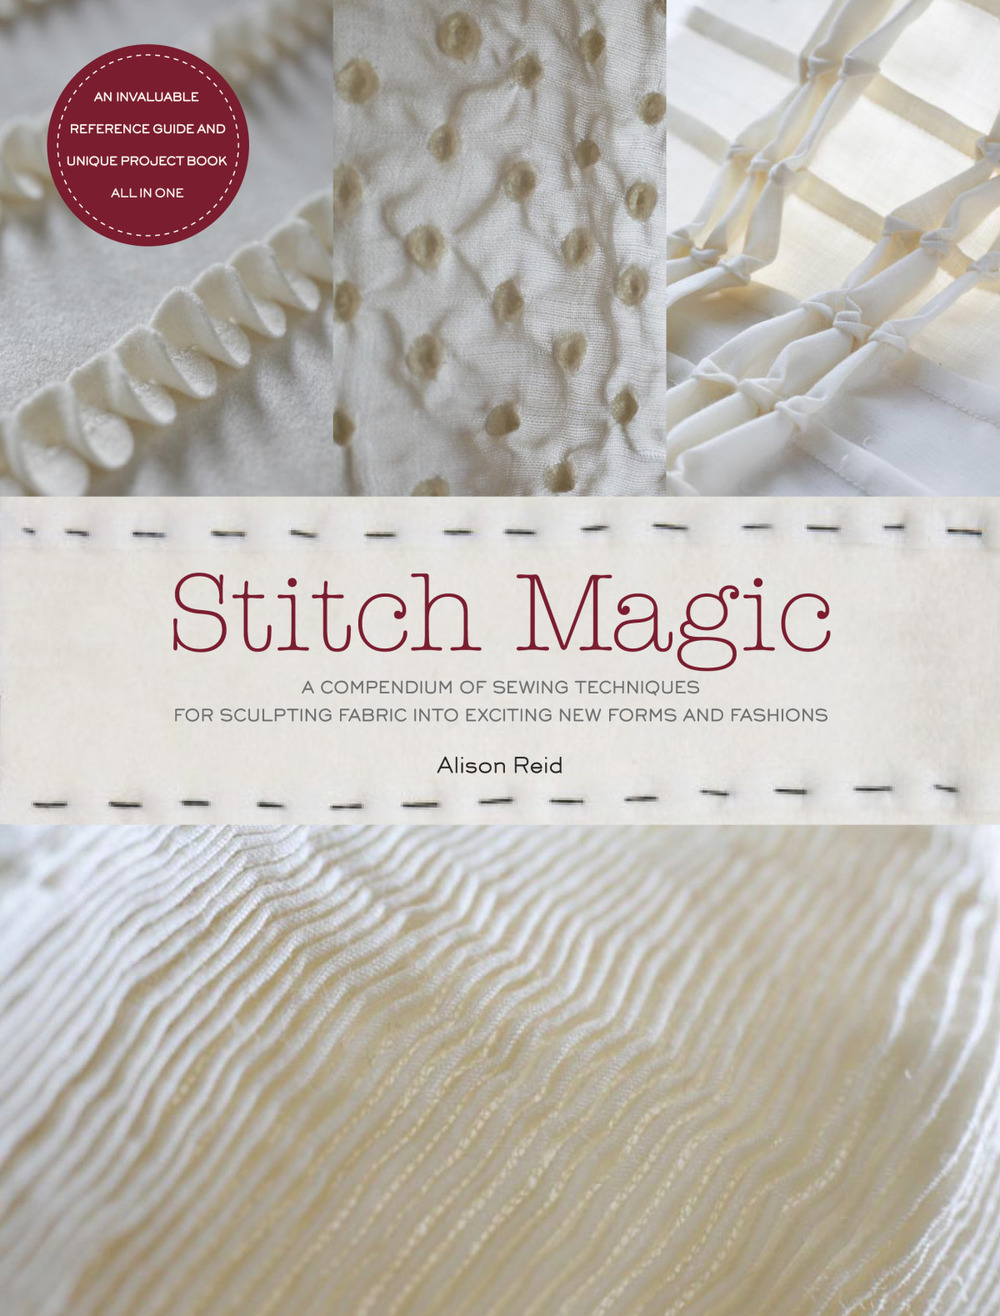
Stitch Magic: A Compendium of Techniques for Stitching Fabric Into Exciting New Forms and Fashions is one of the new books on STC Craft's spring list, and it's a wonderland of fabric manipulation--how to fold, twist, pleat, and pucker fabric, then stitch it down into the most mesmerizing creations. The first time I set eyes on the photos from Stitch Magic, I'll admit to being a bit intimidated, but once I started reading through the directions, I was shocked to discover that these techniques are actually quite simple to execute. Some may take a little time to create, but the looks you can acheive with these simple twists and turns are so incredible, the time spent is absolutely worth it.
Stitch Magic is divided into nine sections by technique--cut shapes, folded shapes, pleating, pintucking, quilting, cording, hand-stitch marks, smocking, and special fabrics. Included in each section are directions for the technique, with lots of of ideas for varying it (all shown in photos), plus projects.
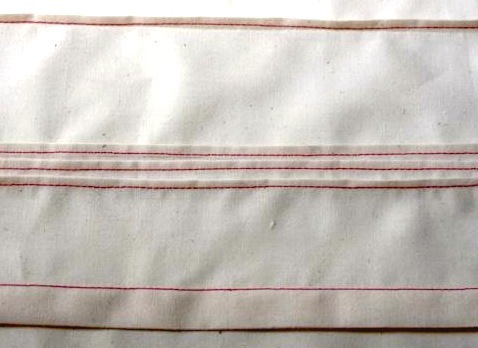
The technique that caught my eye first was cording, which is essentially done by laying a piece of cord on fabric, holding it in place, then stitching it down with a wide zigzag. You can swirl the cord to make a meandering trail, hold it down straight and narrow, or twist the cord every few inches to make a loop that hangs freely from the fabric (as shown on this pillowcase.)
Last week I decided to use the cording technique to make a long scarf that I could wrap around my neck several times. Since I'm a knitter, too, I have a ton of stash yarn on hand. So I used some of my leftover yarn scraps for the cording, and I of course couldn't stop at just one color--I had to have blue, green, gold, light brown, and white.
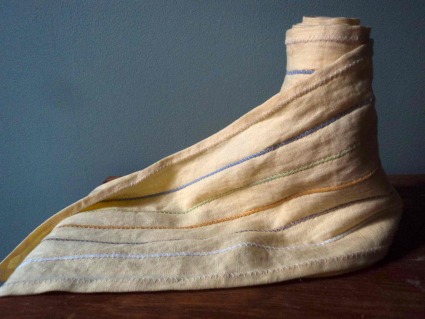
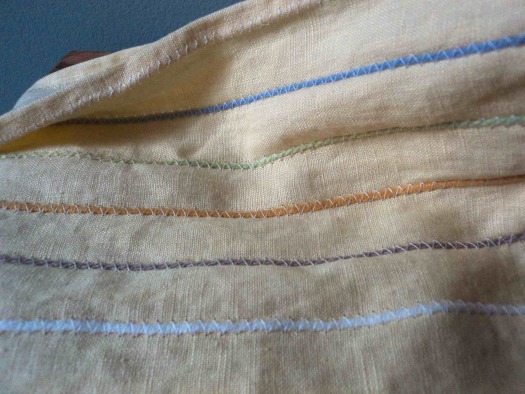
One of my favorite features of the finished scarf is the white zigzag stitches on the reverse side (below). The cording beneath creates ridges on the back, and the white slanted stitches against the yellow provide glints of sheen and a bit of texture.

And here I am wearing the scarf this weekend. While it may not be perfect springtime weather here in New York, I did manage to find some time yesterday to sit in the park and bare my arms in the sunshine. And with the scarf draped several times around my neck, I was nice and cozy, daydreaming of the leaves that will soon be on the trees.

As you can see, the fun of Stitch Magic is imagining what you can create with each technique. The book includes a number of projects to get your creative juices flowing, but it is also intended to inspire you to strike off on your own. You can add a little embellishment (along the hem of a skirt, perhaps?), or embark on a larger endeavor (wouldn't it be lovely to create an entire quilt top using this cording technique?) The choice, of course, is up to you!
To see a gallery of images from Stitch Magic, click here.